Tuesday, January 11, 2022

A Sister house, the Greenleaf Buttercup

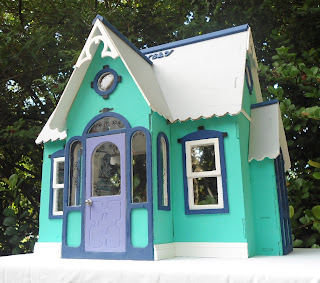
I recently finished building a Greenleaf Buttercup dollhouse for a special family, with the colors chosen by the new owner, Linsey. This house will be in the same bedroom as the pink Dura Craft Ashley dollhouse I built about a year ago for her half sister Jenise. 

Linsey has a different personality then Jenise so she chose more fun bright colors for her house. She also chose purple for the front door color. I gave both of the girls these houses bare so they could add their own decorations and furniture, etc. I managed to get this done just before Christmas, so I hope they're enjoying them both!


Greenleaf Buttercup Dollhouse


Greenleaf Buttercup Dollhouse


Greenleaf Buttercup Dollhouse


Greenleaf Buttercup Dollhouse

Greenleaf Buttercup Dollhouse

Greenleaf Buttercup Dollhouse


I also uploaded a quick video of the completed house on my YouTube Channel Mini-Shack, with more detailed interior and exterior photos. As with almost all my videos, there are clips of the building process at the end of the video. Here is the video on YouTube:


Now that I have built both the Dura Craft Ashley and the Greenleaf Buttercup, I can say they are pretty much the same size and take the same amount of time. Originally the Ashley dollhouse kit came with a spiral staircase, but I chose not to use it and built a straight set of stairs instead. So when I started building the Buttercup and realized it doesn't come with any stairs at all, I decided to use the spare set from the Ashley! So in case anyone has noticed - YES, the Ashley spiral staircase is installed in the Buttercup. 

Since the Buttercup is done now, I started working on my new Cape Cod Skilcraft house. It was my Christmas present to myself, and even though I have so many other exciting projects to choose from I couldn't wait to open the box and get it started. It's not a large house, so I don't anticipate taking too long to complete it. I really wanted cedar shake siding to make it as authentic as possible, but was dreading the task of applying the shingles by hand. So I went to one of my favorite dollhouse websites miniatures.com and did a quick search. I was delighted to find exactly what I was looking for: a sheet of pre-molded shake siding. I painted a few layers of different tones of grey, did some rubbing, and the weathered look came out perfect. I'm excited to get the rest of the house together, as I'm doing a little bit of kit bashing as well. More on that later!

Thanks for visiting :-)

~ Mini-Shack

Tuesday, December 28, 2021

Merry Mini Christmas, to ME!

For the past few years I've been hunting for this specific house, a Skilcraft Cape Cod. I saw one on eBay, but it was overpriced and I couldn't quite tell if the box had been opened. I don't usually spend money on myself during the holidays, but a couple weeks before Christmas one popped up on Marketplace. An unopened kit, still with the plastic wrapper on it. It wasn't a local pickup, it came from California, and not only was the price low but the shipping was free. It showed up on my doorstep in just 5 days, during Christmas week! 

I have also been on the hunt for a reasonably priced Real Good Toys "New Orleans" house, or a vintage Batrie "Bradley" house, but had decided that whichever house I found first would satisfy my craving for a "Cape Cod" style house to build. Skilcraft wasn't a high end brand, but this will be a much lighter house than either of the other two and I will make it awesome. It also has a unique feature that the other's do not, a carport!


Skilcraft Cape Cod Dollhouse


I actually own another Skilcraft house, the "Colonial". One of my oldest friends gave it to me when she explained that her Mother was cleaning out her storage shed and was going to throw it away. It was her childhood dollhouse, which she had completely forgot about. I told her I would rehab it and make it a fabulous Colonial Estate house. One day in the future if she ever wants it back she can have it. She had very fond memories playing with that house as a child. 

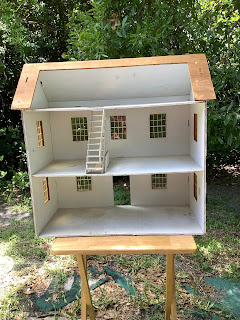
I have not started the actual renovations yet, but I have collected quite a few construction parts for it - a front entry door, columns, shutters, siding, etc. Skilcraft houses are plywood, but come with plastic siding, windows and shutters and the roof shingles are strips of thick pre-cut black paper. So all that will be replaced with wood parts and roof shingles. Here's the house the day she brought it over (after I stripped the roof). I have all the extra parts that came with it in a bag:


Skilcraft Colonial Dollhouse 1:12 Scale

Skilcraft Colonial Dollhouse 1:12 Scale

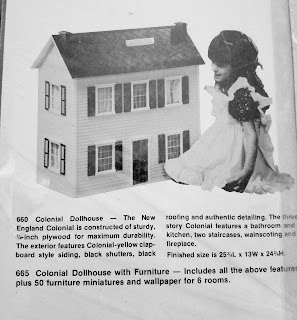
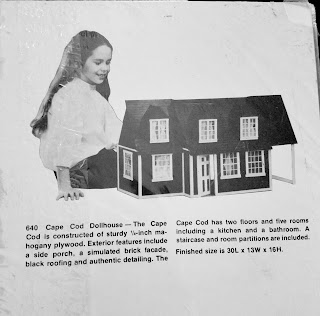
Here's a diagram of some of the Skilcraft Dollhouse models, which is a photo of the back of the box of my new Cape Cod house. It doesn't include their "Nob Hill" model, which is a grand scale house or their "Federal". Also pictured below are close up photos of the two houses I currently own. I've also had my eye on an eBay listing that included the Victorian Mansion plus a matching Coach House (not shown in the photo). I love houses with mansard style roof's, and the coach house is really cute too. I've actually seen several listed on eBay, but all the box conditions were kind of terrible, so I didn't want to risk it.


Skilcraft Dollhouses

Skilcraft Colonial Dollhouse 1:12 Scale

Skilcraft Cape Cod Dollhouse 1:12 Scale

I hope everyone had a great Christmas, and looking forward to another New Year of miniatures! Lots of fun and exciting projects to get to. 

Thank you for visiting!

~ Mini-Shack

Saturday, October 9, 2021

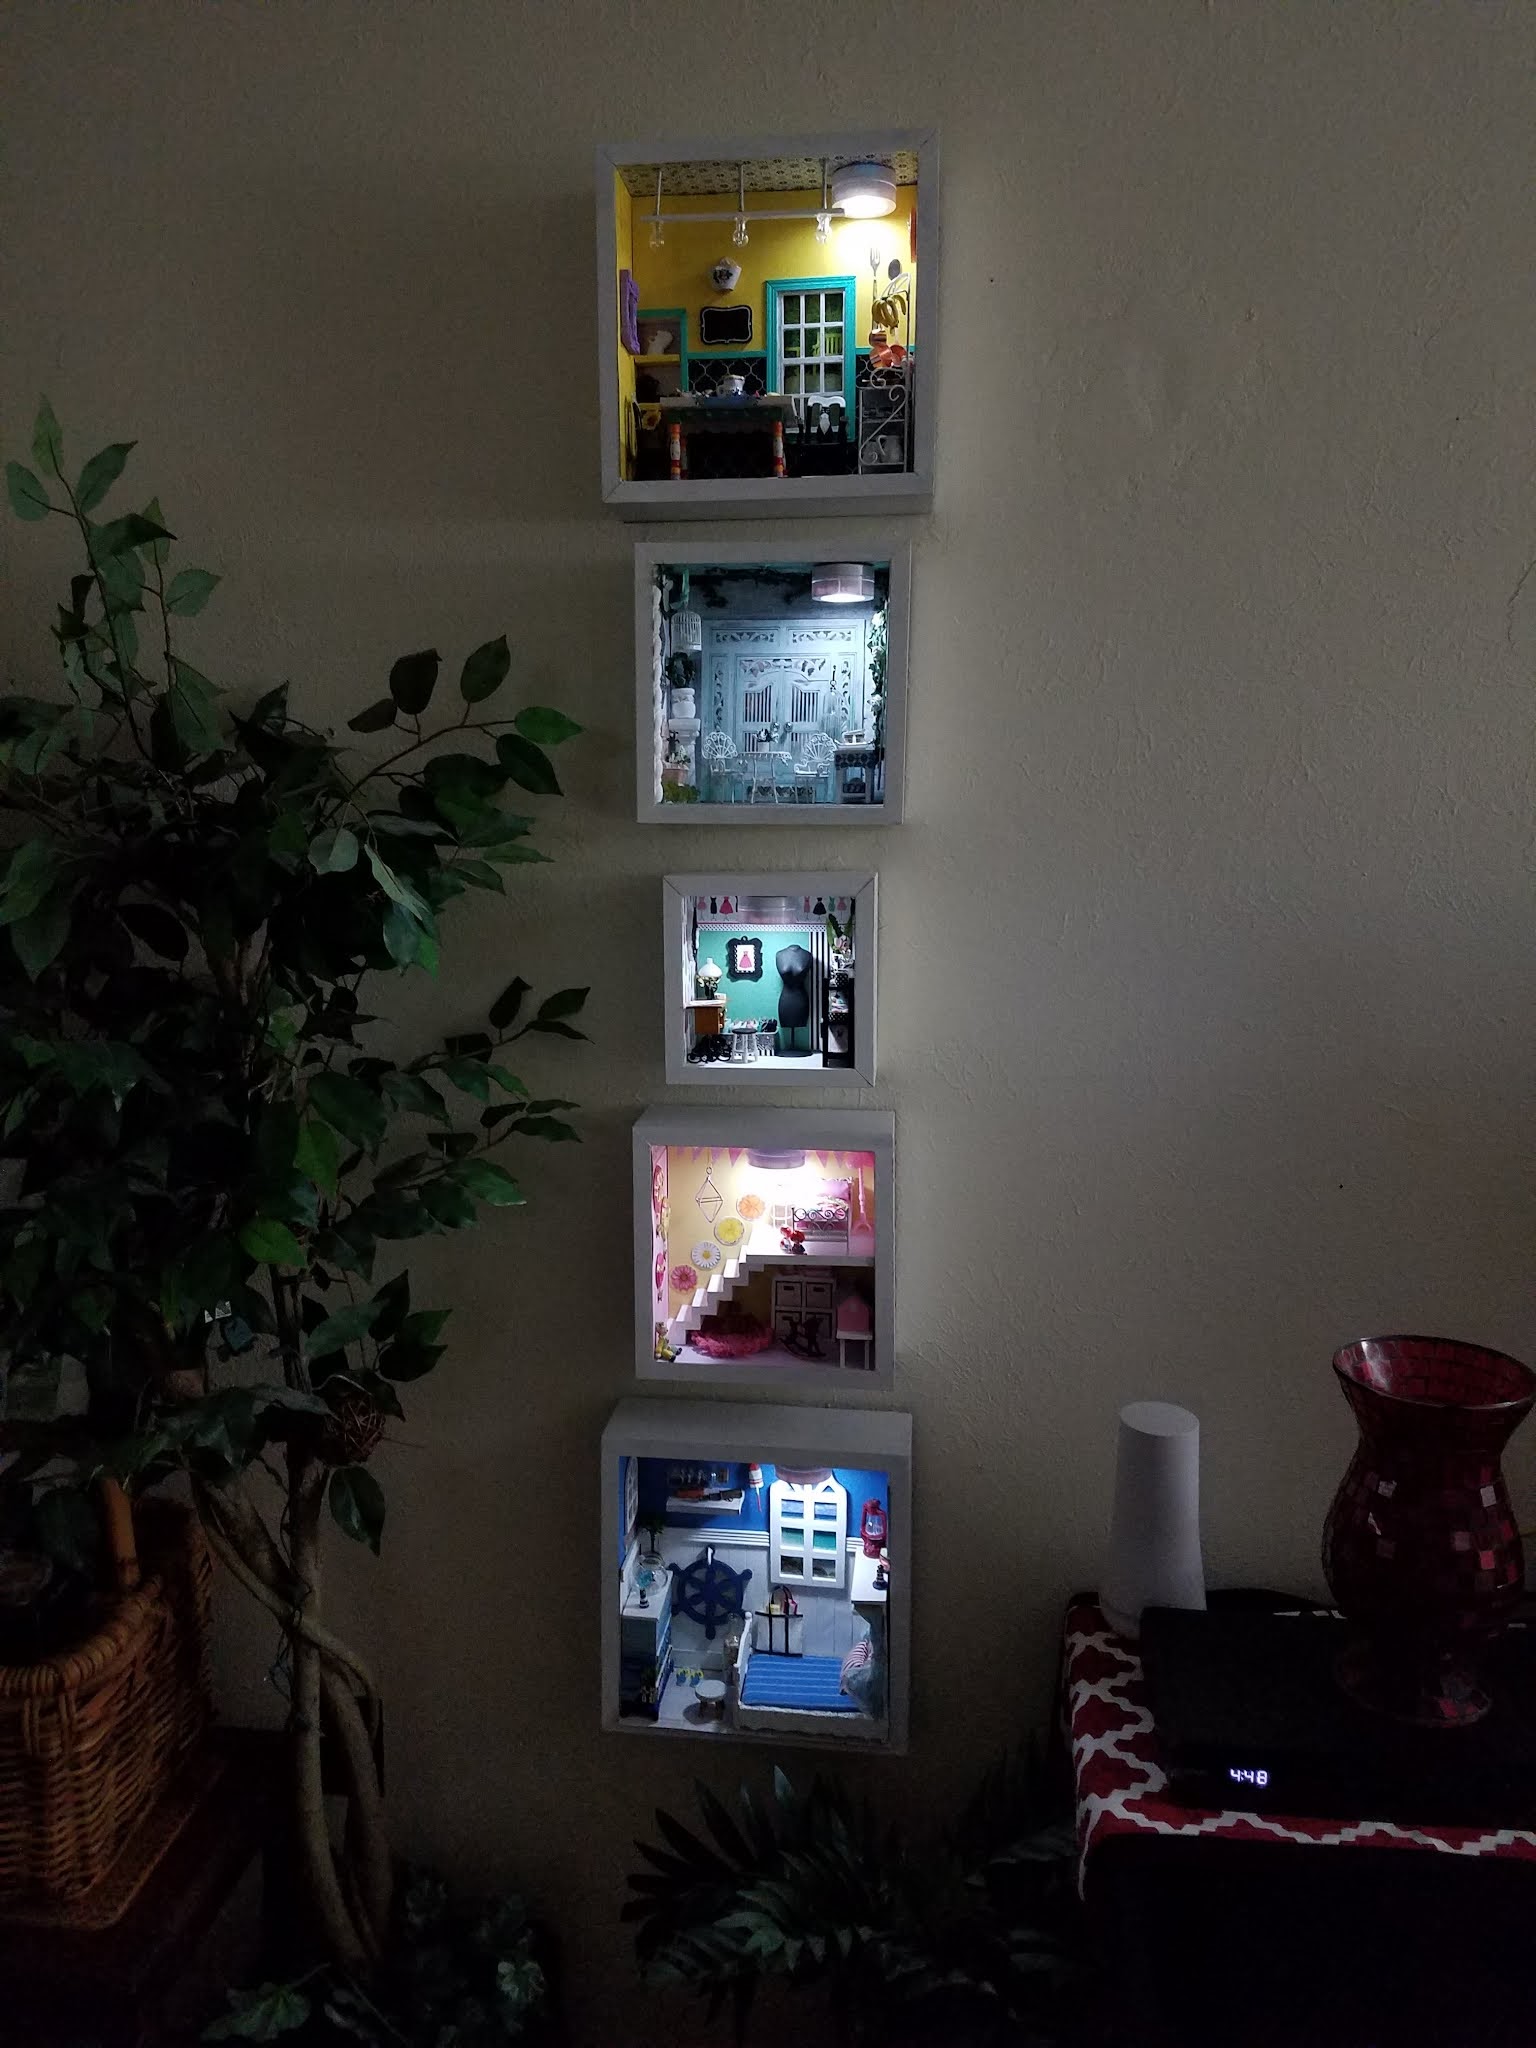
Dollhouse Miniature Room Boxes-Wall Boxes

I love to go thrift shopping, because you never know what you're going to find. For a miniaturist, it's more like a treasure hunt. After all, it's true that "one mans junk is another mans treasure". My goal for every trip is to find a dollhouse, furniture or a dollhouse kit. But finding random accessories is always fun too.

Mini Shack Wall Boxes
I came across this set of five square boxes, that the previous owner had spray painted gold. There are three sizes: two large, two medium and one small. I painted each of them solid white so they would blend on the wall - but the rest of the decorating is individual to each box. The boxes gave me an opportunity to display some of my favorite fun pieces, and to also use a lot of leftover trim, etc. in smaller spaces. I made the back walls with foam board and most of the wallpaper is scrapbook paper.


As an afterthought, I remembered I had a set of 5 disc lights that work on a remote control and offer multi colors and dim levels. I attached those after the boxes were already hung on the wall, and they look great at night!

Mini Shack Wall Boxes

Mini Shack Wall Boxes

Here's is the video that shows the details a little closer, and the boxes with the lights on. Enjoy!


Let me know if you have any questions about any of the pieces or techniques. Happy weekend and thanks for visiting!


~ Mini-Shack

Sunday, August 1, 2021

Mia's House

Just finished Mia's house! She's going to be so excited, and I wish her many years of imagination play in this custom house, made just for her. She requested these colors, and I must say they turned out lovely.  I left the house very basic so she can add her own curtains, lights, rugs, pictures, furniture, etc.

This kit was an older Whitney Tennyson, and the wood was rather challenging. Not good quality at all, but overall it's a GREAT house to build. This version of the Tennyson requires a lot of trim, and I'm referring to extra trim not included with the kit. They're pretty generous with trim in the kit too, but again the wood quality was really bad I had to use my own.

I ended up using a set of stairs that I had in my stash instead of building the stairs from the kit. With the wood quality as bad as it was, I didn't feel like slicing my fingers up any more than I had to. I was shocked at the porch balusters however, as that part of the wood was in decent shape so the porch and balcony railings came out good. The doors all open and close, and they're reinforced with a strip of ribbon holding them in place. When I glued the roof peaks together I also ran a strip of electrical tape across the tops for some extra reinforcement. I added a foundation since the kit doesn't come with one. The stone exterior is actually strips of wallpaper.

I would be very, very interested in getting my hands on another Tennyson kit and doing some major kit bashing and upgrading. When I was dry fitting the house, prior to adding the third floor peaks, I definitely saw an Art Deco modern Miami style house. Would love to explore that further!

Please enjoy this short video, as it includes the building process as well:


Here is the front and back of the finished house:


Tennyson Dollhouse


Tennyson Dollhouse


Now I need to figure out which project to start next! I have so many waiting, plus quite a few room boxes. I may do a few room boxes so I can get those hung up on the walls. I've always wanted to do that, and I managed to find just the right ones. For now though, as I do after every build, it's time to clean up and reorganize.


Happy Sunday and Thank you for visiting!!


~ Mini-Shack


Monday, June 7, 2021

Spring Cleaning

So it's time to take inventory, because I've acquired enough dollhouse kits to last me the rest of my life. The way I see it though, I'm setting myself up for retirement. Not financially, I mean something to keep me busy, HA! Here is my current situation:

Dollhouse Kits in boxes:

Walmer Mint Julep with Left and Right Wing Addition

Greenleaf Emerson Row

Greenleaf Rosedale

Greenleaf Buttercup

Greenleaf Orchid

Greenleaf Travel Trailer

Real Good Toys Princess Anne

Real Good Toys Beachside Bungalow

Real Good Toys Victorian Cottage Jr.

Dura Craft Pioneer Log Cabin

Dura Craft Newberg

Artply Highland

Artply-Whitney Tennyson

1/4 Scale Town Kit

1/4 Scale Village Kit 


I couldn't get them all in one photo, because they're scattered all over the house now, but here's a few:

 
Here's how some are stored temporarily (pardon the mess! Construction zone):

 
 This is the Travel Trailer and Quarter Scale 1/4 Building Kits


Houses in progress:

Greenleaf Harrison Partial Build

Greenleaf Harrison Rehab

Petite Dreams Victorian

The base of the Artply Highland

These are just the dollhouses. I have 9 room boxes and 3 lanterns that could be done at any time too. It seems I have managed to also acquire quite a bit of furniture, fixtures and construction parts. It was time to reorganize my stash and thin out the parts/pieces I didn't need to keep. By the time I was done, there wasn't much in the "get rid of" pile but I did manage to rearrange all my stuff in appropriate bins. It also gave me a chance to take a look at everything again, which was a pleasant experience because I forgot about a lot of really cool pieces I have! 

I also spent time repairing pieces that were set aside because they needed work. While I was repairing a side table I noticed how beautifully detailed the carvings on the wood were. Once I found my reading glasses and tipped it over I saw that it was a Bespaq™ table. Nice little surprise. 

So for now I'm getting ready to build the Tennyson that will be given to a family friend, a 9 year old girl. She request turquoise and yellow as her colors, so this will be a fun and bright colored house. This will be only the second time I've built a house for a little girl to actually play with, so I won't be furnishing it, just giving her the house. More photos and details to come!

Thanks for visiting!

~ Mini Shack


Saturday, May 8, 2021

Key West Inspired Renovation

I've had this dollhouse for a while now, it was rescued from a thrift shop and in pretty good shape. Originally I thought it was an Alison Jr. by Real Good Toys, but then realized the floor plan is reversed. After some research I found the original kit, and now I know it's a "Petite Dreams Victorian". It's practically identical to the Alison Jr, but built with hinges instead, and the trim on the outside is a little different. I've also noticed the doorways are more narrow than a standard RGT house.

After staring at it for several months, I decided it's better suited as a Key West - New Orleans - Charleston style house. I wanted it to be colorful, but didn't want the colors to get too overwhelming so I made the base house color white. That way the soft pastels and the green landscaping would "pop" a little more. I live in South Florida, so I've seen many houses as inspiration for both the exterior colors and the landscaping. I don't usually landscape my houses, but this definitely needed it. I bought a 2ft x 2ft plywood board at Lowes and sealed the house to the board before I began. It's a permanent part of the house now.

I haven't started the inside yet, but my intentions are to make every room white, and use my collection of white wire metal ornate furniture throughout the entire house. As you can see from the photos below, I've included some pieces outside already. Each room will have a very faint pop of a pastel color. I've been collecting white wire pieces for almost 10 years now. Some are Alice Lacy brand and some are Windsor Collection brand, and some are just beautiful unbranded pieces with intricate ornate designs. I've been buying them based on my taste, not so much brand name, but I have a feeling my collection is worth a pretty penny by now!

Once the inside is complete I'll do another video for my YouTube channel and post pictures here. For now though, please enjoy the exterior photos:

Petite Dreams Victorian

Petite Dreams Victorian

Petite Dreams Victorian

Petite Dreams Victorian

Petite Dreams Victorian

Petite Dreams Victorian

Petite Dreams Victorian


Petite Dreams Victorian

Petite Dreams Victorian

Petite Dreams Victorian

Petite Dreams Victorian

Petite Dreams Victorian

Petite Dreams Victorian

Petite Dreams Victorian

Petite Dreams Victorian

Petite Dreams Victorian

Petite Dreams Victorian

Petite Dreams Victorian

Petite Dreams Victorian

Thank you for visiting!

~ Mini-Shack


Tuesday, March 23, 2021

Mini-Mini Brimbles Mercantile - BB SWEETS!

The quarter scale Village kit and Town kits from Greenleaf are really cute, and fun to build. Needless to say, they don't take long to put together. The first house I grabbed was the mini Brimble's Mercantile, which was the whole reason I bought the kits to begin with. As I was building it I was reminiscent of BB Sweets and how much fun it was to complete. I wanted to replicate the original as close as I could, I think it turned out adorable! 

Here it is next to the 1:12 scale version - Brimble's Mercantile, "BB Sweets"


Brimbles Mercantile


I tried to match the shingles as best I could, and of course the columns and vines in the front. This particular house is completely sealed, so there was nothing to decorate on the inside.  Here are some closer photos:


Brimbles Mercantile

Brimbles Mercantile

Brimbles Mercantile

Brimbles Mercantile

Brimbles Mercantile

The kits also include a mini Arthur, I will post photos of that one when it's done. I'll be making it a mini replica of my 1:12 scale Arthur as well. I may even try to do real stucco on the quarter scale version. I'm pretty sure I still have the original paint color from the Arthur. The colored shingles may be a challenge however.

Meanwhile I still have the beginnings of my Artply Highland under construction, plus the multiple built houses that need rehab, and oh yeah the stack of kit boxes that have houses screaming my name, plus the room boxes that are sitting empty, and/or half decorated. I guess I know when I retire I will never get bored!


Thanks for visiting :-) 


~ Mini-Shack