Showing posts with label Keystone of Boston. Show all posts

Saturday, April 1, 2023

New Acquisitions and Inventory Time

I usually browse Facebook Marketplace with a simple keyword search: dollhouse. The results are mostly plastic children's play toys but occasionally wood dollhouses and dollhouse kits pop up.  If you've followed my blog you know I've acquired some great houses on Marketplace. When I did this recent search a garage sale popped up because they mentioned a dollhouse in the description of the post. I contacted the seller to inquire if the dollhouse was wood or plastic, and she replied with TWO wood dollhouses for $30 total. She attached pictures of the houses, and I couldn't do the electronic payment fast enough. I purchased a DuraCraft Sweetheart that is completely finished and fully electrified, including two working light fixtures and the second house is a Walmer Cranberry Cove, unfinished on the inside and missing the front porch attachment. I can do a lot with this Walmer house, I'm looking forward to working on that one.

Cranberry Cove and Sweetheart
 

Walmer Cranberry Cove, 1:12 Scale


Walmer Cranberry Cove Dollhouse


Walmer Cranberry Cove Dollhouse

DuraCraft Sweetheart Cottage 1:12 Scale


DuraCraft Sweetheart Dollhouse

Both of these houses are new projects for me, as I intend to finish off the Cranberry Cove, and completely redo the Sweetheart as a Tudor style with a thatched roof. I just can't look at the roof lines on this house and not see a thatched roof. I'm not fond of the current colors either, or the decorative hearts all over the house. I could possibly get carried away and make it a fairy house, the potential is there, but as of now I'm thinking of a clean lined tudor.

The Cranberry Cove may end up with a solid brick exterior with no front porch, or my second vision is a smaller front porch than the original, that just covers the front door area. If I do that I would try to add a bay window on the first floor as well. I'm still looking at both of these houses carefully, to get a clear vision.

I wasn't able to blog about this next acquisition, because four days after I bought it my home flooded in the storm surge from Hurricane Ian in South Florida on September 28, 2022. This is a Hofco Federal Victorian, that I drove 2 hours one way to pick it up. I also found this on Marketplace, and honestly didn't realize how big it was until I picked it up. Not only is it the largest house I have, it's made of MDF wood so it is very heavy. The back is solid flat because it's a front opening dollhouse, so it's a lot like a piece of furniture. It's similar in size to a small dresser. The house is in pretty good shape, a few pieces need to be reassembled and the hinges need reinforced, but overall it's great.

HOFCO Federal Victorian Front Opening Dollhouse 1:12 Scale

Hofco Federal Victorian Dollhouse

Hofco Federal Victorian Dollhouse


Since I have a dollhouse display room now, I'm starting to absorb the size of my collection. In addition to the houses I have listed below, I have many room boxes, lanterns, odd scale houses and my built Quarter Scale houses. Once my dollhouse room is completely set up I will post a video and photos. 

CURRENT DOLLHOUSE INVENTORY
Listed in order of acquisition


Built Houses:
1949 Keystone of Boston
Greenleaf Travel Trailer
Greenleaf Arthur
Greenleaf Brookwood
Greenleaf Harrison Rehab
Greenleaf Harrison Partial Build
Petite Dreams Victorian
Greenleaf Buttercup
DuraCraft Ashley
Greenleaf Brimbles Mercantile
Whitney Tennyson
Batrie Sparrow Lane
Skilcraft Colonial
Greenleaf Washington
Skilcraft Cape Cod
Lundy Gotenburg
Hofco Federal Victorian
Walmer Cranberry Cove
DuraCraft Sweetheart
Four Greenleaf 1/4 Scale Houses

Dollhouse Kits:
DuraCraft Pioneer Log Cabin
Real Good Toys Princess Anne
Real Good Toys Victorian Cottage Jr.
Artply Highland
Walmer Mint Julep w/Left and Right Wing Additions
Greenleaf Rosedale
Greenleaf Orchid
Greenleaf Travel Trailer
Greenleaf Village Kit
Greenleaf Town Kit
Greenleaf Emerson Row
Real Good Toys Beachside Bungalow
DuraCraft Newberg
Real Good Toys Conservatory

I have several projects in mind that I want to get started on, I need to decide which one I should tackle next. Most likely it won't be a new kit, as I have several built houses that need to be refinished. In the meantime, I think I will stay off of Facebook Marketplace for a while, Ha! 

Thank you for visiting!

~ Mini - Shack

Tuesday, April 22, 2014

Keystone of Boston Dollhouse Refurbish

I put together a quick video, about 4 1/2 minutes or so, of the refurbish of the 1949 Keystone of Boston Dollhouse. The video below shows the basic transformation and the finished product. I'm working on a better one that documents the step by step process of each room and the exterior, which I'll post later on. But for now, enjoy!


Thank you for viewing!

Sunday, April 13, 2014

Whew, it's finally done! Keystone of Boston 1949 Dollhouse

After almost 2 years, it's finally done! My mother's 1949 Keystone of Boston Dollhouse, all grown up. In fairness to me, I've taken many breaks in between but I spent many many hours, days, weeks working on the inside, the outside, and the furniture and decorations.  This wasn't just a rehab project, I took special care to leave something original in every room. There is also something personal in every room too, even including the patio. It's been through three generations of little girls, this house was loved and played with by my mother, me and my sister, and our daughters.

Dollhouse Playtime, 1971

My goal was to make the house a realistic modern house, and since the kids are all grown, no longer a toy house. The exterior was an easy choice, as I wanted to stay with the Colonial style and also try to keep the same design as the original screening that was pre-printed on the outside. I used white clapboard siding for the upper half, with brick on the lower half. There were 3 original window frames, the two upstairs bedrooms and the kitchen. I left the remaining two windows open, just framed the exteriors. The roof is removable, and surprisingly in good shape, so I decided to leave it in it's original state.


Original Exterior - Roof On
Original Exterior - Roof Off

Completed Exterior - Roof Off

Completed Exterior - Roof On

The interior was a totally different story. Among the challenges was the fact that Keystone of Boston Dollhouses aren't exactly 1:12th scale. I have a mixture of scaled furniture in each room that helps to balance out the realistic look. I'll post a before and after shot of the front below, but I am currently working on a video and detailed photos of each room. There are so many tiny details, it was so much fun to complete!


Original Front

Completed Front

 
Original Living Room

Completed Living Room

Original Dining Room

Completed Dining Room

Original Kitchen

Completed Kitchen
Original Bedroom - Left Side

Completed Bedroom - Left Side (Master Bedroom)

Original Bedroom - Right Side

Completed Bedroom - Right Side (Guest Bedroom)
Original Bathroom

Completed Bathroom

Original Patio

Completed Patio


When I originally began working on the house I had it on an oversized piece of plywood that I had intended to create a yard out of. However, one of the special features of the Keystone's is that it sits on a rotating wheel so you can spin it around. In keeping with the original design, I decided to ditch the plywood and just set it up on a table.

This was a total labor of love. I enjoyed every minute of it, and I am kind of sad it's done. But as they say, is a dollhouse really ever done? I'm always on the lookout for mini's, and always thinking of what room I can update and put things in. For now, I will shift my focus to my new project, The Arthur. I've already kit-bashed it in my head, so this should be fun. I've made a chimney and bought a fireplace for the living room, and I intend to scrap the bedroom window and make a door out to a balcony instead.

Stay tuned!

Monday, February 10, 2014

Wall Hanging Tutorial

Tutorial: How to make Easy Wall Hangings for your Dollhouse


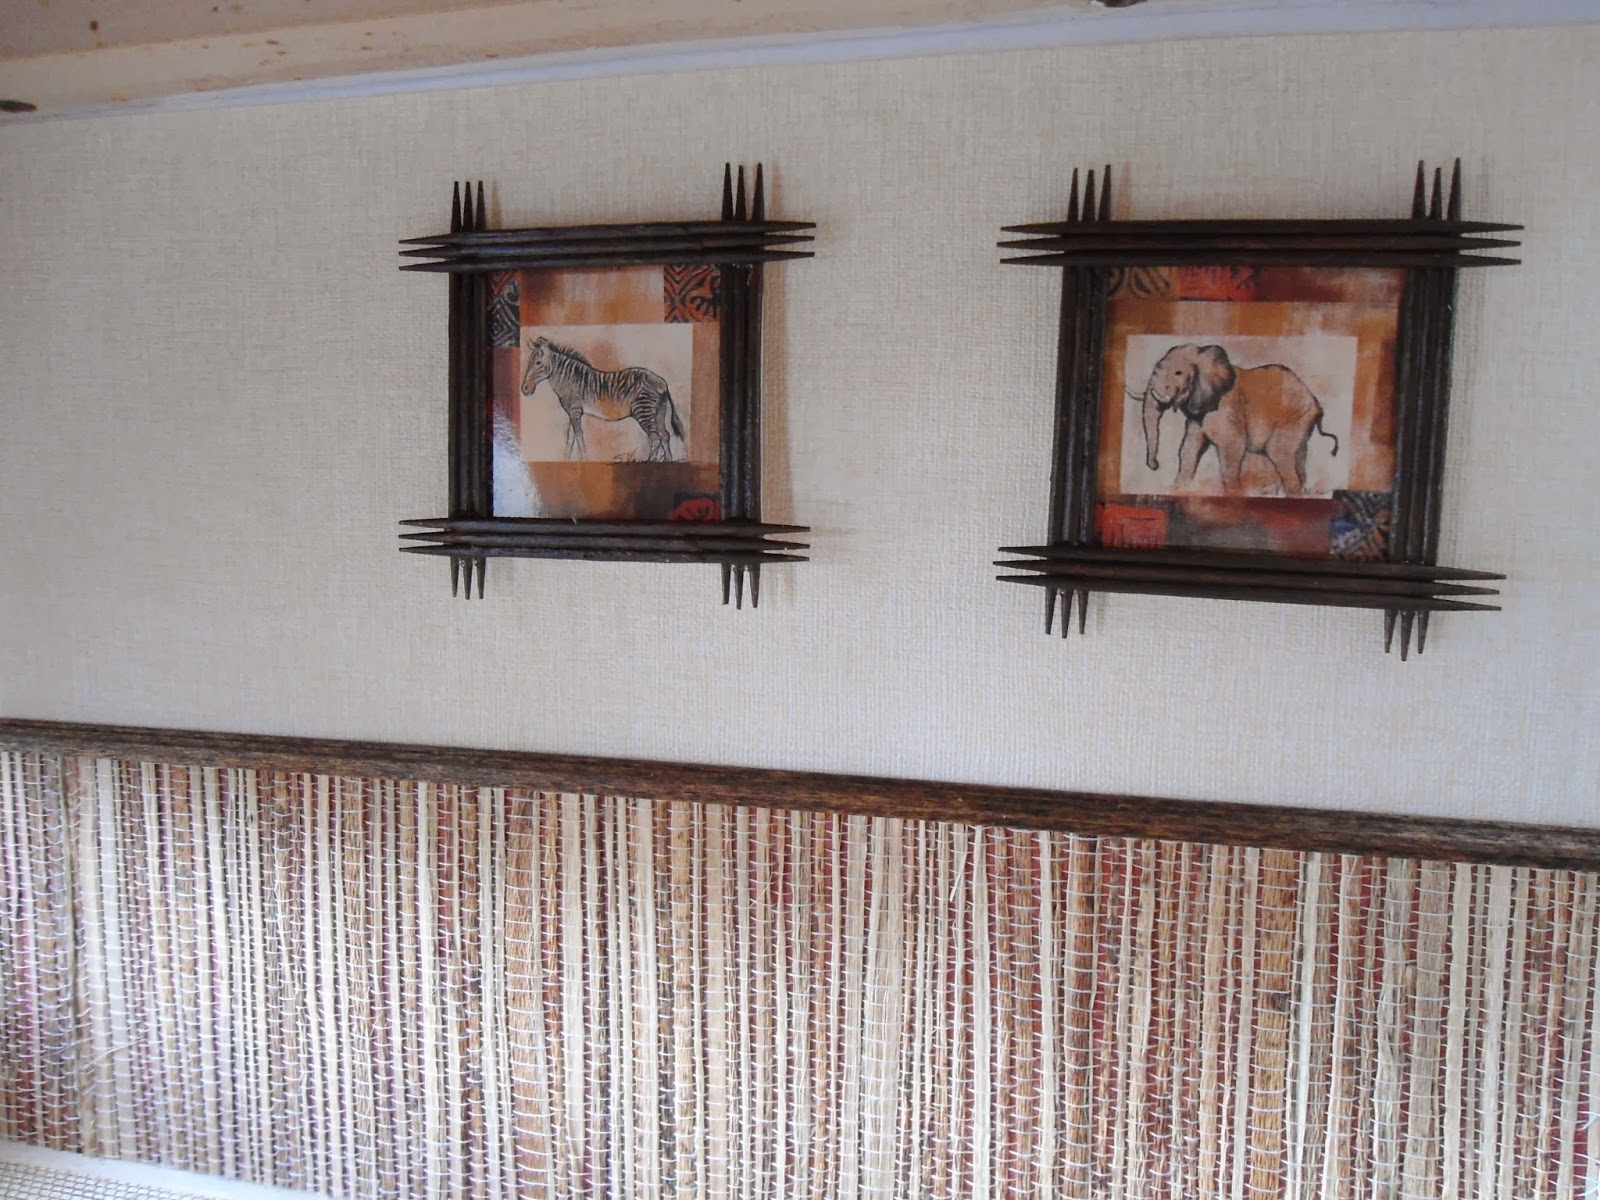
The living room in my Keystone of Boston is modern and African themed, so finding artwork for the room was challenging. I realized that I had the tools to make my own, and so I began...


Things you'll need:
Internet Access
Printer
Photo Paper/Cardstock Paper
Toothpicks
Paint/Stain
Glue


The longest part of this project is waiting for the glue and paint to dry.


Google what you're looking for, then save it on your device. Scale it down to 1x1 inch or 2x2, whatever size you need.
Print out the photo. I used a color printer with photo paper.

Please note: I do not sell anything I make. I use everything strictly for my own personal amusement. I'm pretty sure there would be some copyright issues if you googled the wrong photo and attempted to sell it :-)

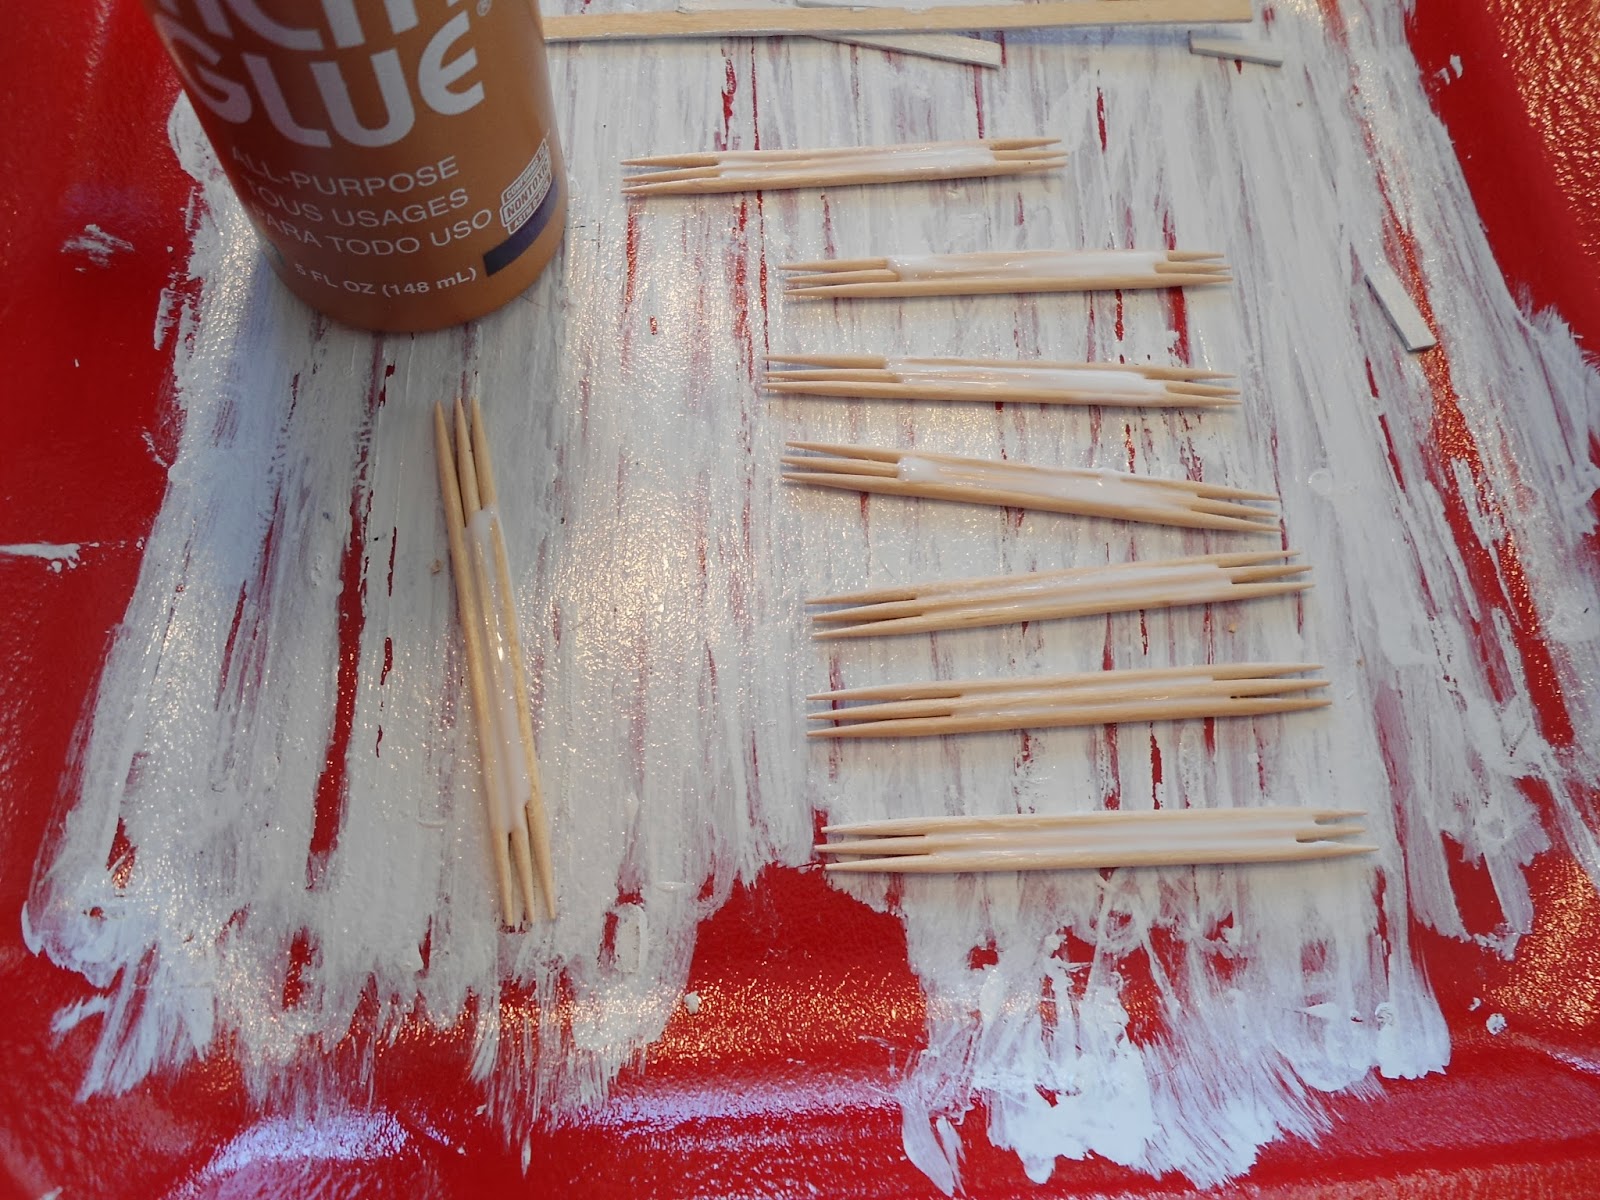
Take 3 toothpicks and glue them together evenly

Let the glue dry

Make 4 sets of the three toothpicks glued together, one for each side of the frame (there are 8 pictured because I made two)
Paint or stain the toothpicks to desired color or shade and let dry completely
Glue the painted toothpicks to the edges of the photo


Repeat for all 4 sides, then let the glue dry

All done!!

Finished project on the walls


This is really quick and easy to do. I also made frames out of wooden coffee stir sticks, single toothpicks and some leftover chair rail pieces. Any kind of tiny pieces of leftover wood, metal, plastic or wire would work. You can also glue fabric around a piece of cardboard if you're looking for color, patterns or geometric shapes. The possibilities are endless!


Painted toothpicks as frames

Coffee stir sticks and leftover chair rail pieces as frames


You can print out your own photos of family members, friends or pets if you want to personalize your dollhouse.
 

There's many printable templates out there to make a lot of things for your dollhouse, they're pretty easy to find on the internet (or Pinterest). But there's a few other things you can do yourself too:


  • You can take a photo of your flat screen TV (while it's off), print it out, then glue it to a thin piece of wood, or black painted styrofoam and ta-da! you have a flat screen TV.
  • Take photos of favorite places, like vacation spots or monuments, or favorite restaurants or buildings and print them out to put in frames.  
  • Take close up photos of flowers in your yard, or anywhere you see them, and print them out to put in frames.
  • Take photos of your own magazines, newpapers and books and print them out real small and make mini's out of those as well.


 Like I said, the possibilities are endless!


Friday, February 7, 2014

Welcome to my blog

Welcome to my new blog!
I've been working on restoring and redecorating an original 1949 Keystone of Boston dollhouse that belonged to my mother when she was a child. She played with it when she was little, my sister and I played with it when we were little, and our daughters played with it when they were little. It's been through three generations now, so my Mom didn't have the heart to get rid of it. I volunteered to take it off her hands, and the obsession began....

Soon I'll post the documented project, step by step. The dollhouse was brought into modern times with complete redecorating so most of the recognizable Keystone of Boston traits are now gone, but I did leave something original in every room. As soon as I finish the exterior, the Keystone will be done. I've also documented some easy tutorials along the way.

Here's a photo of the original house when I brought it home from Mom's attic:

1949 Keystone of Boston Dollhouse
Exterior - Before Renovations


The roof is removable, and the house sits on a lazy susan so you can rotate it in a circle. In it's original state as shown below, the kitchen folded into the dining room for storage.

1949 Keystone of Boston Dollhouse
Interior with the roof off - before renovations

Shown with the kitchen folded into the dining area - before renovations


The house originally came with electric too! Keystone of Boston sold three versions of this house. One as pictured above, one without the extra kitchen that folds in for storage, and one just like this one but with a garage added to the other side of the house. The garage also folded into the living room for storage. My mother received this as a Christmas gift in 1949 and when I did a little research I found them in a Sears catalog from 1949 for about $8.50.


While I'm finishing the exterior of the Keystone I'm starting an "Arthur" dollhouse by Greenleaf that I currently have sitting in a box brand new. I'll document the progress from step 1 and post the updates here.

Thank you for visiting my page and subscribe or check back for updates!