Showing posts with label Redecorate. Show all posts

Saturday, October 9, 2021

Dollhouse Miniature Room Boxes-Wall Boxes

I love to go thrift shopping, because you never know what you're going to find. For a miniaturist, it's more like a treasure hunt. After all, it's true that "one mans junk is another mans treasure". My goal for every trip is to find a dollhouse, furniture or a dollhouse kit. But finding random accessories is always fun too.

Mini Shack Wall Boxes
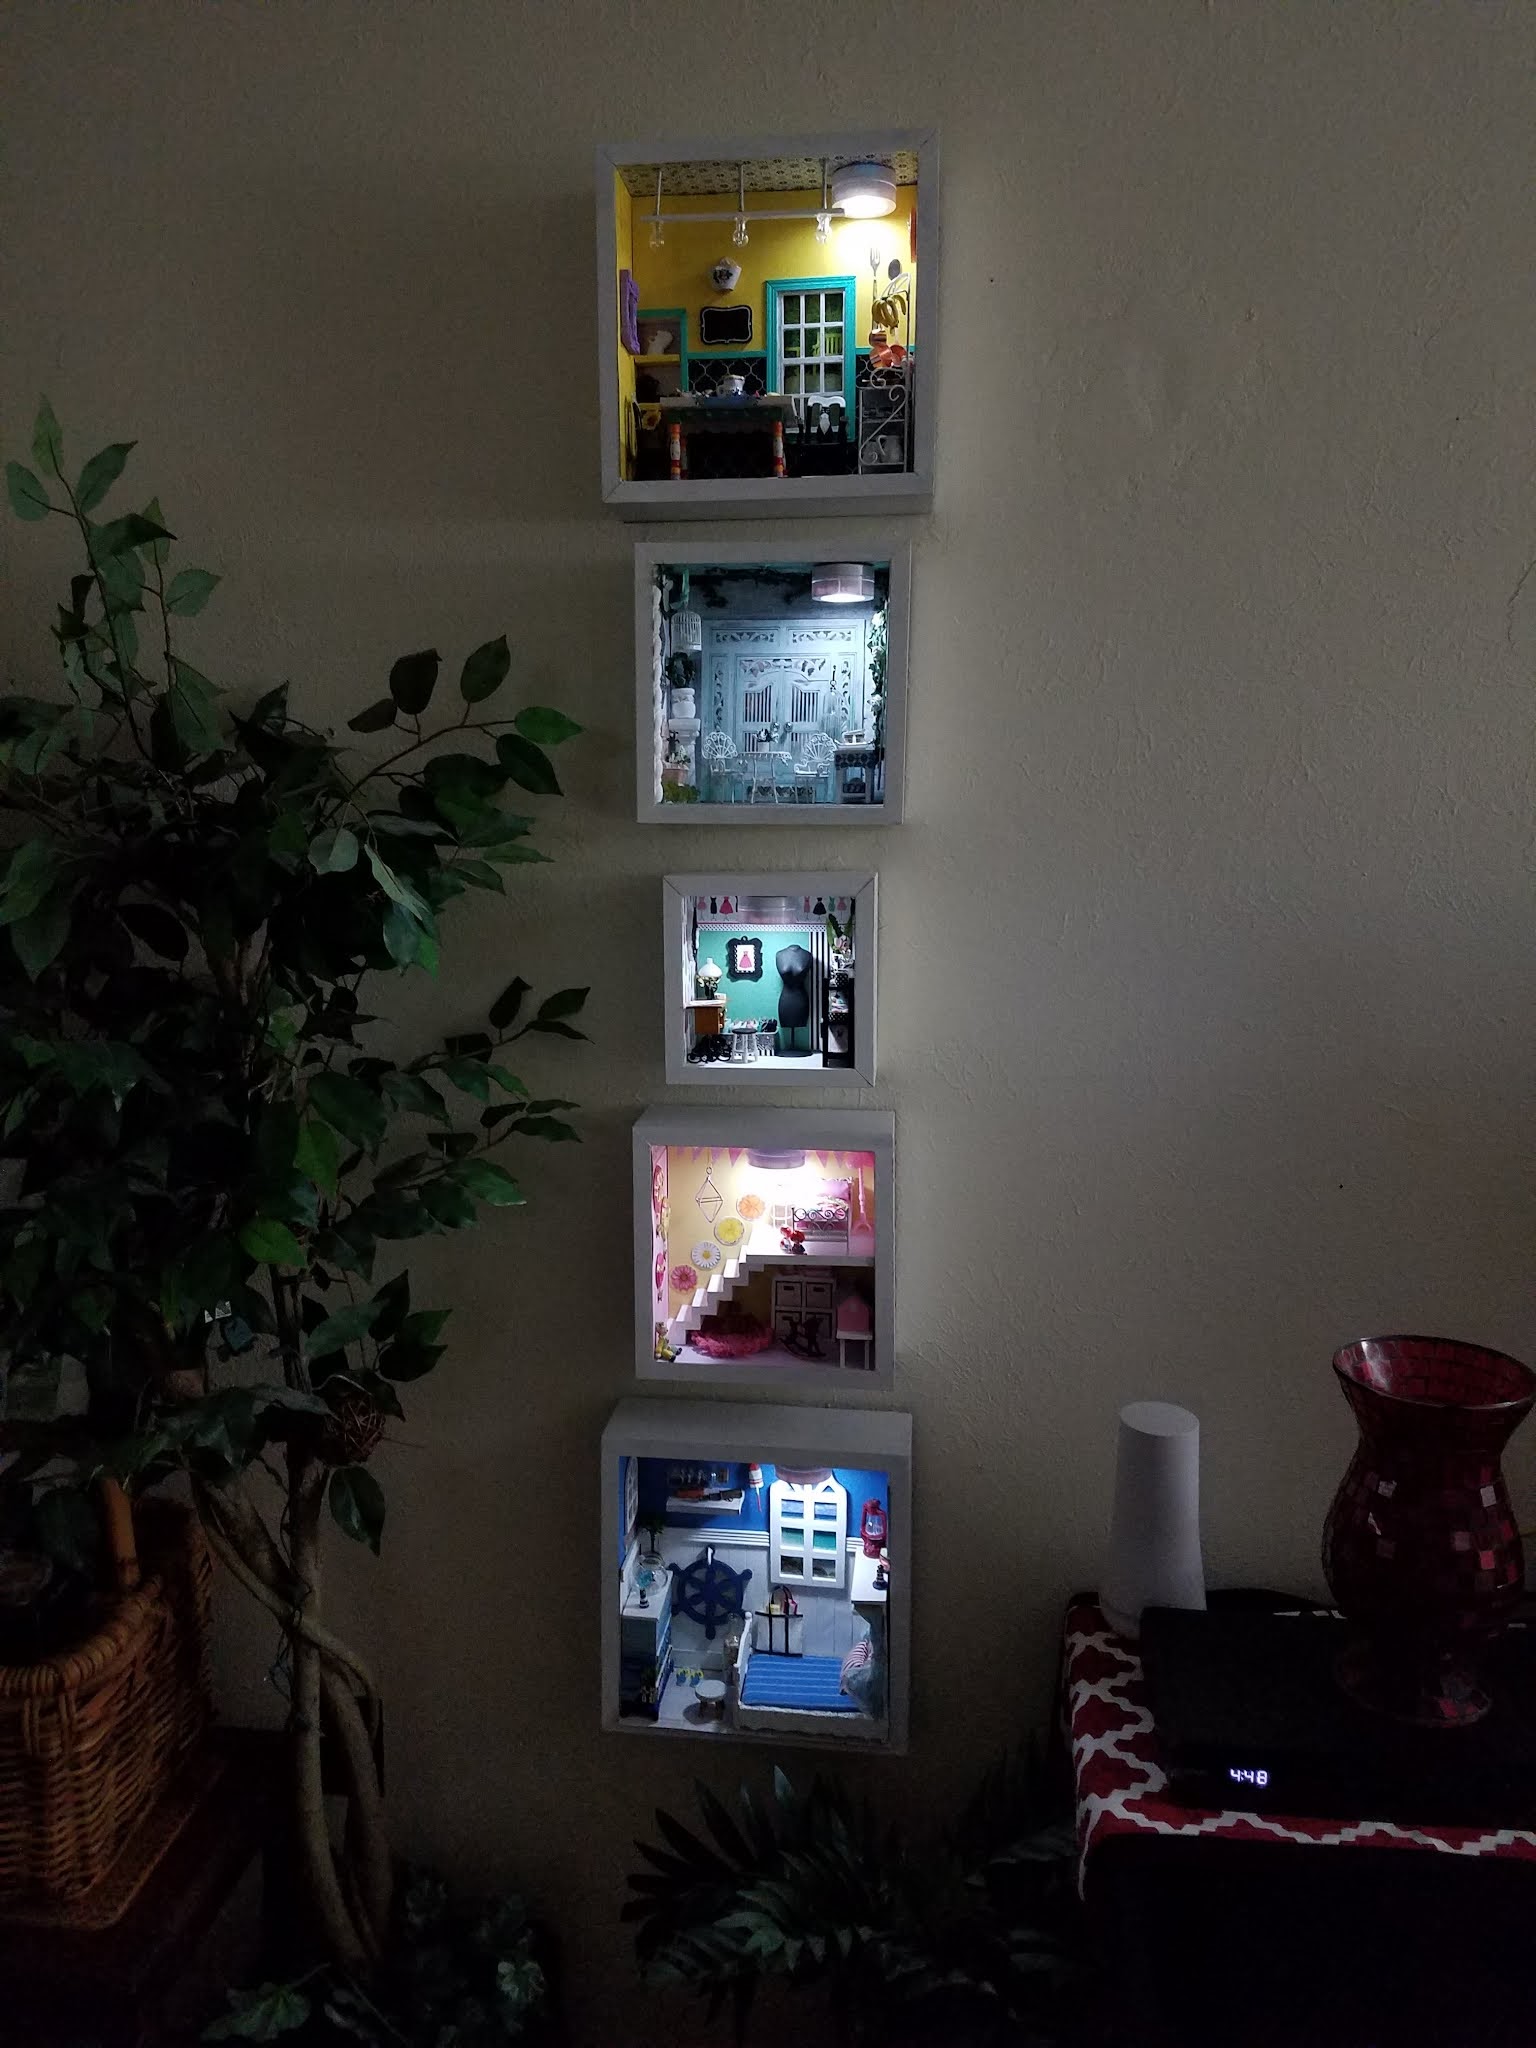
I came across this set of five square boxes, that the previous owner had spray painted gold. There are three sizes: two large, two medium and one small. I painted each of them solid white so they would blend on the wall - but the rest of the decorating is individual to each box. The boxes gave me an opportunity to display some of my favorite fun pieces, and to also use a lot of leftover trim, etc. in smaller spaces. I made the back walls with foam board and most of the wallpaper is scrapbook paper.


As an afterthought, I remembered I had a set of 5 disc lights that work on a remote control and offer multi colors and dim levels. I attached those after the boxes were already hung on the wall, and they look great at night!

Mini Shack Wall Boxes

Mini Shack Wall Boxes

Here's is the video that shows the details a little closer, and the boxes with the lights on. Enjoy!


Let me know if you have any questions about any of the pieces or techniques. Happy weekend and thanks for visiting!


~ Mini-Shack

Saturday, May 8, 2021

Key West Inspired Renovation

I've had this dollhouse for a while now, it was rescued from a thrift shop and in pretty good shape. Originally I thought it was an Alison Jr. by Real Good Toys, but then realized the floor plan is reversed. After some research I found the original kit, and now I know it's a "Petite Dreams Victorian". It's practically identical to the Alison Jr, but built with hinges instead, and the trim on the outside is a little different. I've also noticed the doorways are more narrow than a standard RGT house.

After staring at it for several months, I decided it's better suited as a Key West - New Orleans - Charleston style house. I wanted it to be colorful, but didn't want the colors to get too overwhelming so I made the base house color white. That way the soft pastels and the green landscaping would "pop" a little more. I live in South Florida, so I've seen many houses as inspiration for both the exterior colors and the landscaping. I don't usually landscape my houses, but this definitely needed it. I bought a 2ft x 2ft plywood board at Lowes and sealed the house to the board before I began. It's a permanent part of the house now.

I haven't started the inside yet, but my intentions are to make every room white, and use my collection of white wire metal ornate furniture throughout the entire house. As you can see from the photos below, I've included some pieces outside already. Each room will have a very faint pop of a pastel color. I've been collecting white wire pieces for almost 10 years now. Some are Alice Lacy brand and some are Windsor Collection brand, and some are just beautiful unbranded pieces with intricate ornate designs. I've been buying them based on my taste, not so much brand name, but I have a feeling my collection is worth a pretty penny by now!

Once the inside is complete I'll do another video for my YouTube channel and post pictures here. For now though, please enjoy the exterior photos:

Petite Dreams Victorian

Petite Dreams Victorian

Petite Dreams Victorian

Petite Dreams Victorian

Petite Dreams Victorian

Petite Dreams Victorian

Petite Dreams Victorian


Petite Dreams Victorian

Petite Dreams Victorian

Petite Dreams Victorian

Petite Dreams Victorian

Petite Dreams Victorian

Petite Dreams Victorian

Petite Dreams Victorian

Petite Dreams Victorian

Petite Dreams Victorian

Petite Dreams Victorian

Petite Dreams Victorian

Petite Dreams Victorian

Thank you for visiting!

~ Mini-Shack


Sunday, March 14, 2021

The Sparrow Lane Video

They say you're never really done with a dollhouse, and I have found that to be true. I could keep going with this one but I really do have other projects screaming my name. So for now, here's how she'll sit. Enjoy the quick little video!


Thank you for visiting!

~ Mini Shack

Monday, March 8, 2021

We have a name!!

It was really bothering me that I didn't have a name for this great little house I just acquired. I posted photos of it all over the internet asking for help identifying it, because I knew it was from a kit. It was recommended to me on the Greenleaf Forum that I contact Gary at Real Good Toys Company, as he'd been in the business for about 30+ years. So I sent an email to the general info email account along with a photo of the front and back. The next day I got a reply with an ID from Gary! Not only did he reply, he attached the original assembly instructions and schematics. 

Drum roll please........

THE SPARROW LANE by BATRIE

Model DH 26K


The Sparrow Lane by Batrie


The original owners built it exactly as the instructions provided. It seems the stucco kit must have come with the original dollhouse kit since it's included in the instructions. I actually thought it was odd that this was done so well in stucco, and now I know why! It's the one thing on the house that I did not have to touch. I even liked the color!

Here is a before and after photo:


The Sparrow Lane by Batrie


It's good to have the assembly instructions on file too - I keep a folder with all my assembly instructions and schematics for all my builds. I have paper copies and .PDF files for them all. You never know when someone might need them! 

I'll go ahead and park these here in case anyone needs the instructions: Batrie DH 26K 


Thank you for visiting, and a special THANK YOU to Gary at Real Good Toys!

~ Mini-Shack

Sunday, February 28, 2021

The still un-named house has a makeover, and a fun game room!

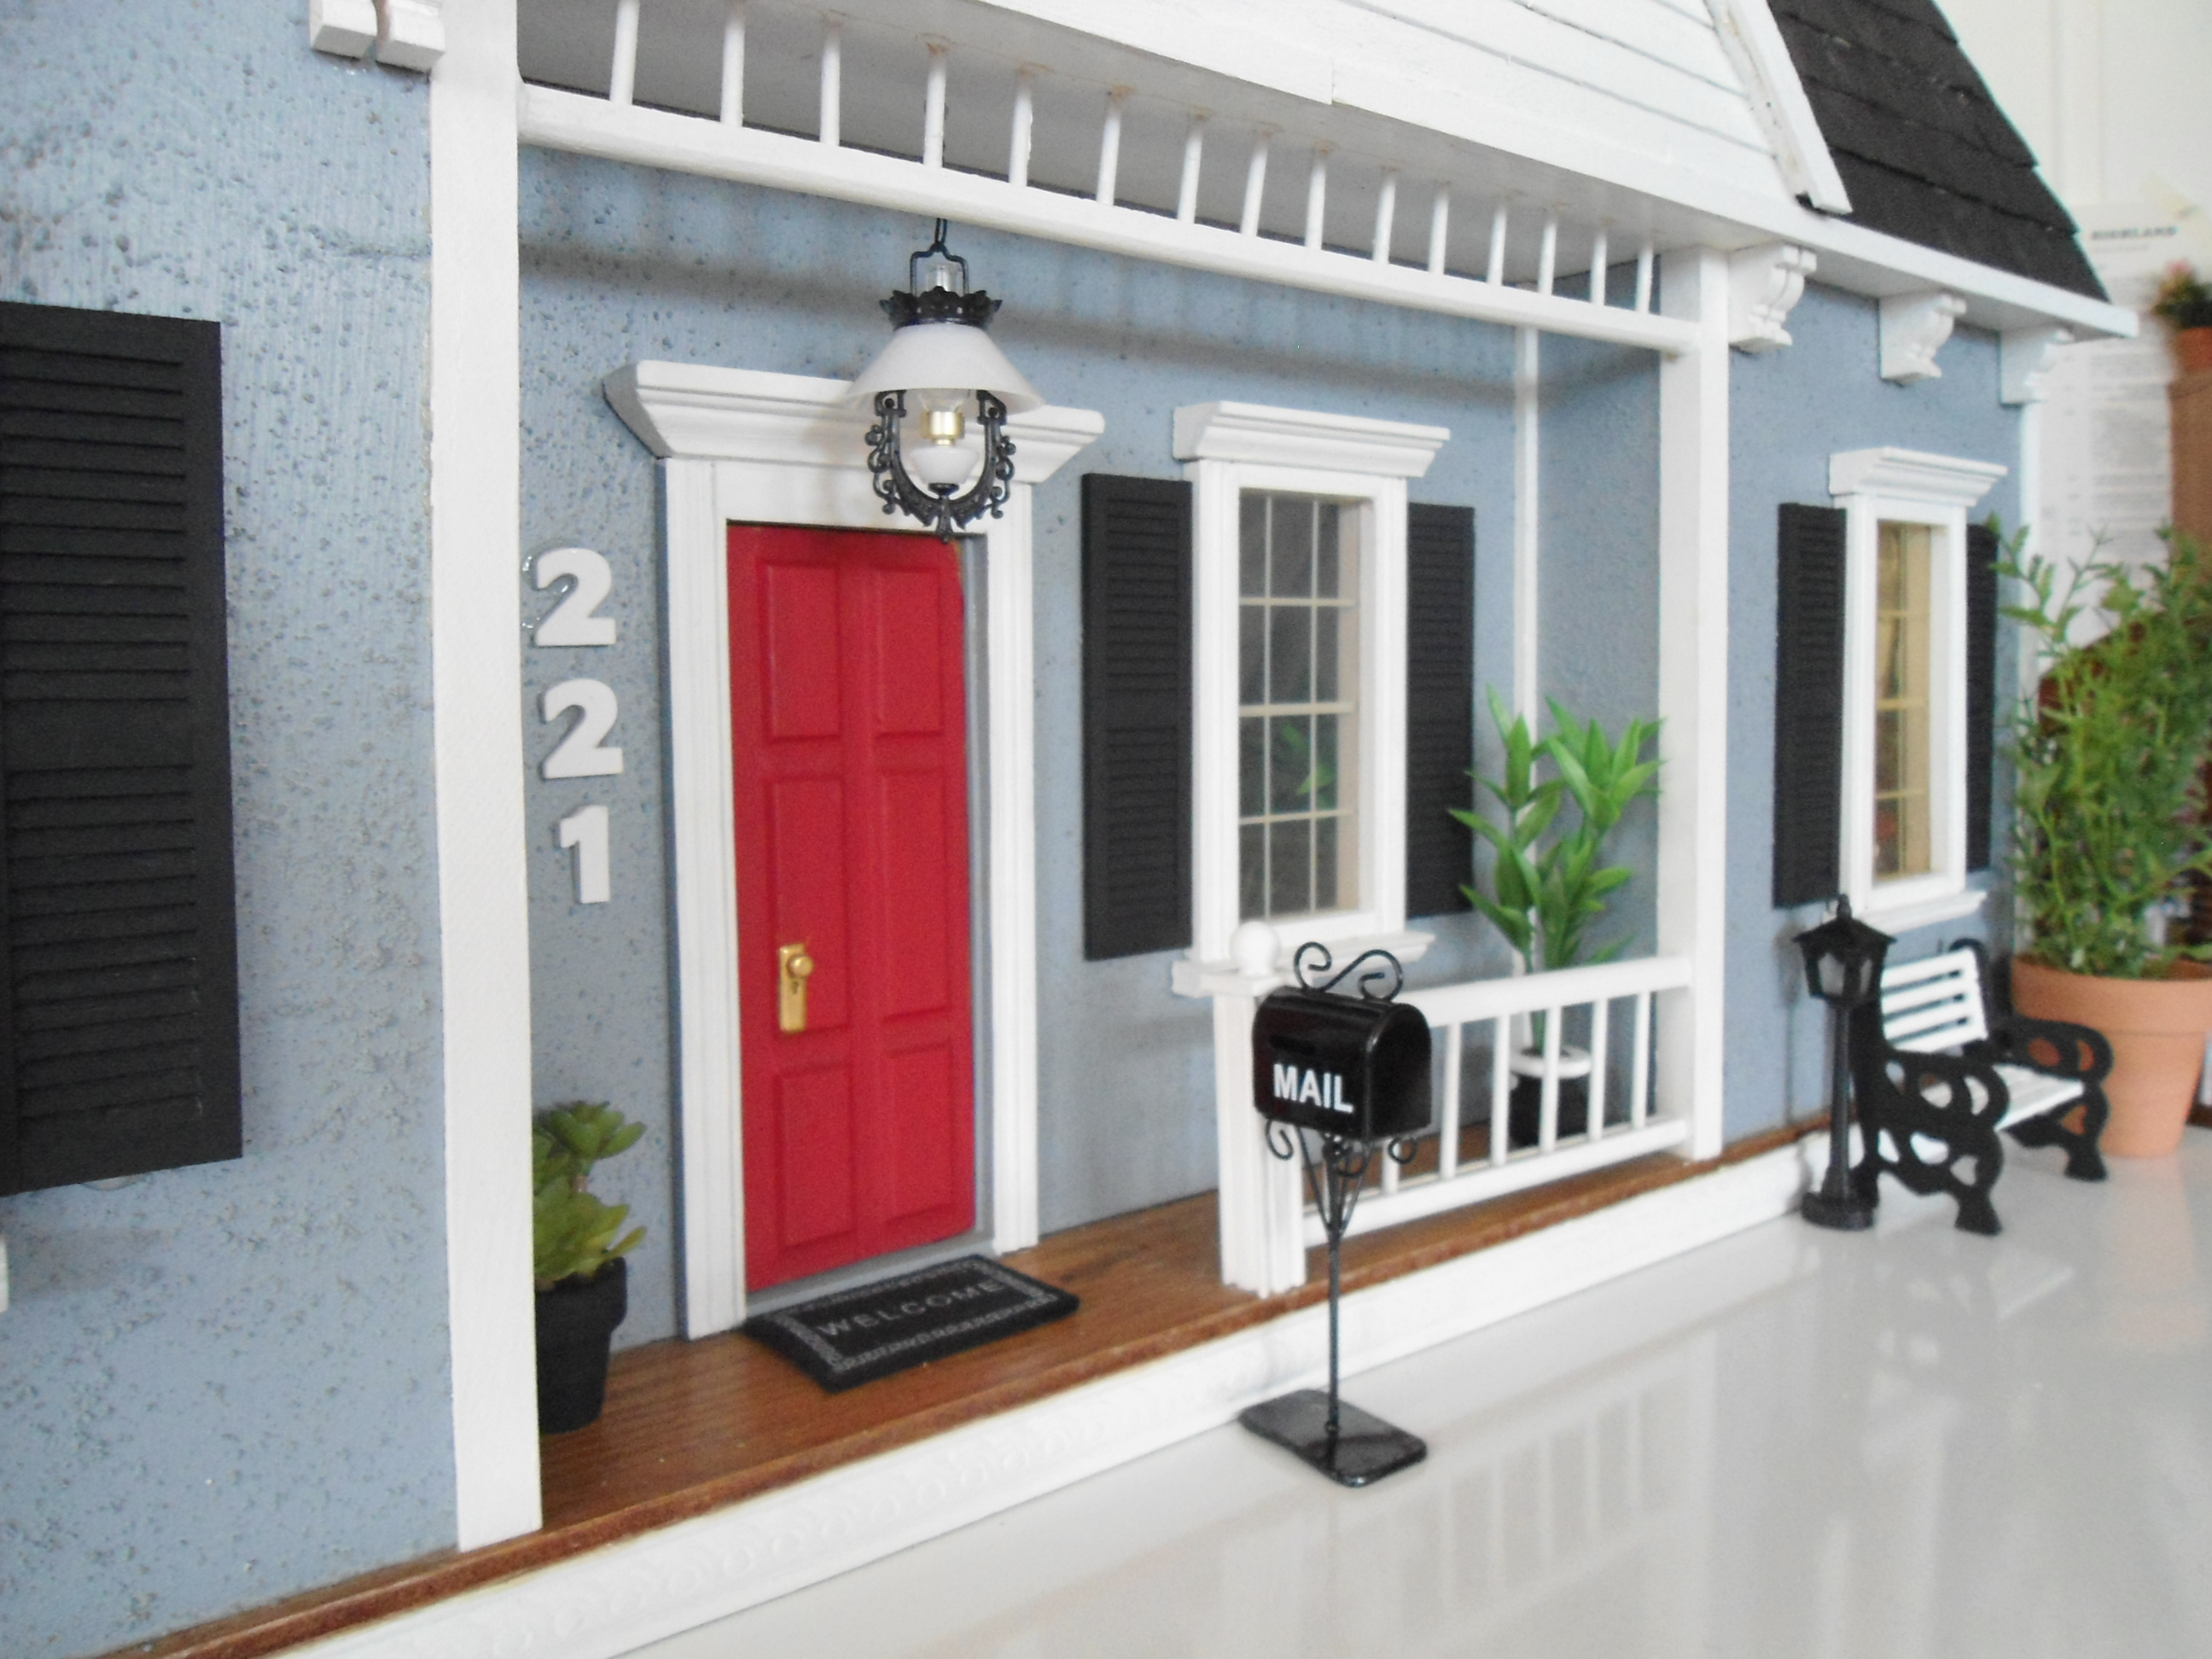
This was a pretty well built house, the original owners did a decent job building it so I didn't have too much to do really. I made a foundation, added exterior features such as new shutters, new paint, hanging Chrysolite lantern and welcome mat (with a key under the mat), new roof trim, new siding in the peak, removed all the gingerbread trim, new flat white roof, white trim throughout. 

On the inside I took out one of the walls upstairs and opened that room up to be a game room - loved having a lot of space to work with! Added interior doors, custom made staircase railing, staircase rug, new flooring, new wall coverings and window treatments.

Here's a few photos of the makeover:


I have more detailed photo, I just didn't post them all here. As usual, I took photos along the way so I will get together a video and upload it to my YouTube channel. I'll post it here too :-)


Thanks for visiting!

~ Mini-Shack

Friday, February 7, 2014

Welcome to my blog

Welcome to my new blog!
I've been working on restoring and redecorating an original 1949 Keystone of Boston dollhouse that belonged to my mother when she was a child. She played with it when she was little, my sister and I played with it when we were little, and our daughters played with it when they were little. It's been through three generations now, so my Mom didn't have the heart to get rid of it. I volunteered to take it off her hands, and the obsession began....

Soon I'll post the documented project, step by step. The dollhouse was brought into modern times with complete redecorating so most of the recognizable Keystone of Boston traits are now gone, but I did leave something original in every room. As soon as I finish the exterior, the Keystone will be done. I've also documented some easy tutorials along the way.

Here's a photo of the original house when I brought it home from Mom's attic:

1949 Keystone of Boston Dollhouse
Exterior - Before Renovations


The roof is removable, and the house sits on a lazy susan so you can rotate it in a circle. In it's original state as shown below, the kitchen folded into the dining room for storage.

1949 Keystone of Boston Dollhouse
Interior with the roof off - before renovations

Shown with the kitchen folded into the dining area - before renovations


The house originally came with electric too! Keystone of Boston sold three versions of this house. One as pictured above, one without the extra kitchen that folds in for storage, and one just like this one but with a garage added to the other side of the house. The garage also folded into the living room for storage. My mother received this as a Christmas gift in 1949 and when I did a little research I found them in a Sears catalog from 1949 for about $8.50.


While I'm finishing the exterior of the Keystone I'm starting an "Arthur" dollhouse by Greenleaf that I currently have sitting in a box brand new. I'll document the progress from step 1 and post the updates here.

Thank you for visiting my page and subscribe or check back for updates!