Monday, December 9, 2019

Meet the Brookwood Boat House

Update on The Brookwood by Greenleaf....after years of talking about it she's built and ready to decorate! What started as a beach house moved more towards a boat house, so I've started calling it my boathouse instead. She's even got a little boat called the SS Brookwood. These pics aren't the final resting place, they're staged for the photos. I'll be adding more little details as I go and will post the final pics once the interior and exterior are completely done.


Greenleaf Brookwood by MiniShack

Greenleaf Brookwood by MiniShack

A little bit of lighting for night fishing or star gazing. The lights are around the deck, the balcony, a tiny light in the mini lighthouse/birdhouse and spot lights on each side of the house in the trees.

Greenleaf Brookwood by MiniShack

Greenleaf Brookwood by MiniShack


First level:


Second level:


More night lighting photos:


I am hand-making a lot more in this house than I ever have before. I've been taking photos along the way to post tutorials, so those will be coming soon too. I'm still working on the inside of the house, it's coming along but I have so many ideas that I can't fit them all in one house!! I'll post updated photos soon. Thanks for looking!

~ MiniShack


Monday, October 8, 2018

The Arthur Dollhouse Video


I have been meaning to post this, I finally did the video of The Arthur! It's a fun little house that I enjoyed building and decorating. I learned a few things along the way, and ended up with extra furniture and accessories after I was finally done. I put some of my favorite stuff in this house, and I really enjoy looking at it and showing it off!

Please enjoy the video and feel free to ask any questions. Thank you for looking!


Monday, July 2, 2018

Ready for occupancy! Meet The Arthur...

This was fun, I enjoyed building this house. No hurry, I could work on it as little or as much as I had time for. I had a lot of ideas for kit bashing as I was building, and it's not out of the question that I buy and build another one, the way I really want it.

For now though, here are finished pics of my current Arthur:


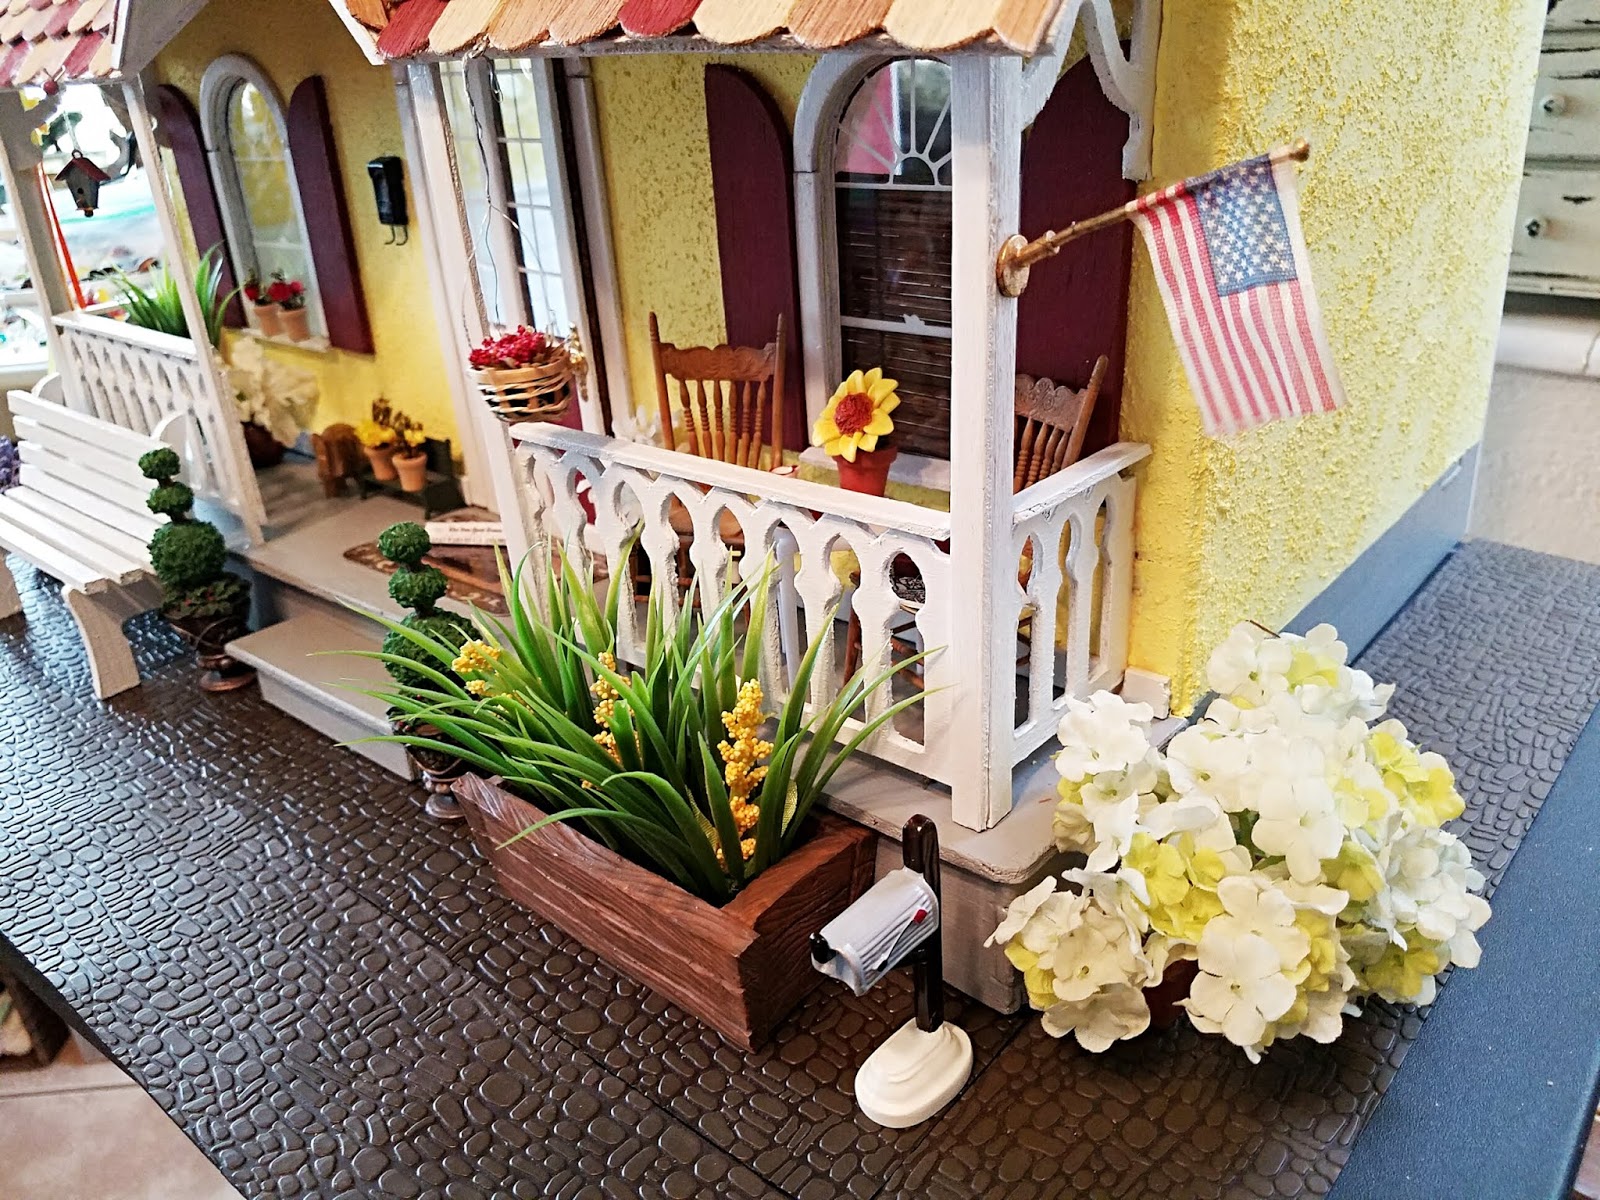
The Arthur
The Arthur by Greenleaf


The Arthur - Back
Inside The Arthur


The Arthur

The Arthur
The Arthur

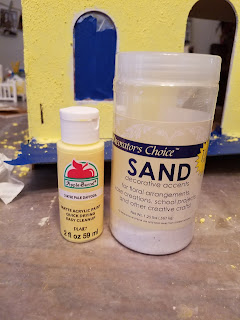
The exterior is stucco - simply made with a mixture of paint and sand. Very simple and easy to apply. Hard on the brushes, and kinda makes a splatter mess, but I love the results.
The Arthur
The Arthur - Stucco Exterior

The Arthur
The Arthur - Stucco Exterior
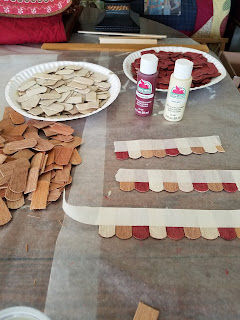
The roof shingles took forever, because I chose to paint half of them 2 different colors and then apply them individually (still in strips on masking tape). It was a labor of love, and I'm happy with the way it turned out overall.
The Arthur
The Arthur - Shingles for the Roof
I like to add a touch of personalization to my projects. I had this little decoration in one of my boxes, thought it would look good in this spot. I made the flower boxes for the three upper windows with balsa wood, glue and paint.

The Arthur

Detailing the front and porch was fun, but I didn't want to go overboard because the back (front) will be facing a mirror.

The Arthur

Notice the statue next to the potted plants by the welcome mat, hard to tell but it's an elephant. ALL of my houses have elephants in them :-)

The Arthur


I found this wind sock on eBay, it was in an estate lot and I bought the whole lot just to get this one item. I love it on this house, it's perfect!

The Arthur

This little birdhouse is also one of my favorite eBay finds. It's metal and hand painted.


I'm actually almost done decorating and furnishing the interior, but here are some pics of the empty version: 


I made a ceiling fan for the living room, it's not shown in this photo but it will be in the finished photos. The mini blinds are made from 1 rattan placemat I bought at Dollar Tree. I cut it to measure then used paint stain ...the living room window and also the bathroom window, which I painted white.

The Arthur
The Arthur - Living Room

The kitchen floor looks like white tile, I made it with Paperclay. I flattened it with a rolling pin, scored it with a straight edge, then painted it white. Added a few layers of Modge Podge to shine it up and seal it. The walls are clapboard siding painted white, and the wallpaper is actually scrapbook paper. The light is a giant bead glued to the ceiling.


The Arthur
The Arthur - Kitchen

I have a whole Rubbermaid tub full of sample wallpaper books I got from a paint store that went out of business. It really came in handy when decorating this bathroom! 

The Arthur
The Arthur - Bathroom

I made the ceiling fan for the bedroom with popsicle sticks and jewelry beads. It was so easy!! The chandelier above the staircase is just a couple fancy beads hung onto a paperclip. The white carpet is from a pack of colored felt pages I bought at Dollar Tree. The curtains are part of a yellow pack of swatches I bought at WalMart for $1. I used the rest of the fabric swatches to make the bedding and pillows. The walls are covered in scrapbook paper and white/grey/yellow paint.


The Arthur
The Arthur - Bedroom

The Arthur kit doesn't come with a railing for the staircase landing in the bedroom, so I picked up a bare kit on eBay and added wooden beads to the posters and painted them grey for some extra decoration.

The Arthur
The Arthur - Bedroom


I didn't do any outside landscaping because I wasn't sure exactly how and where I was going to place this for display. I found the perfect sized TV tray, and a super large mirror I'll hang up behind it so it can be seen from both sides. 

My next project, The Brookwood, also by Greenleaf, is already underway. It's beach themed, so I've been making and buying all sorts of cool little items. As with any dollhouse, the imagination is limitless!

As soon as The Arthur is complete I'll post the interior pictures, and make the video. I have a YouTube page that my projects are on. 

Thanks for looking!!


Monday, May 7, 2018

Hello Arthur!

I took a mini break from my mini world, but jumped right back into it and started The Arthur by Greenleaf! I've had it in the box for a while, and kept looking at it thinking "okay, any day now" and then finally I got all the supplies out, restocked on paint, wood, etc and cleared off the work table.  Since it's only 4 rooms, the furnishing and decorating is limited. I'm using some of my best furniture though to make it really cute. I'm handcrafting quite a bit as well to suit my needs. It will be modern themed, a home that I would live in myself HA. I debated kit-bashing it by adding a balcony off the front bedroom window and using a french door instead (which would really be a simple change and I'm surprised I've never seen one online) but I gave up at the last minute because I'm hoping to get through this one and start the next, The Brookwood by Greenleaf. I've been collecting beach themed items and I'm excited to turn it into a beachfront vacation home. I didn't want to decorate The Arthur beach themed because of the basic design of the home and the exterior features. The Brookwood is a perfect layout for a beach home, and a little more complicated to build, so I'm enjoying The Arthur for now.

Here are a few progress pics:

The Arthur

The Arthur

The Arthur

The Arthur

There's quite a bit more work to go. I still have to stain all the shingles, build-prepare-create the staircase and porch railings, build the roof and all the finishing details. Then the fun part of furnishing and decorating and putting everything in place. Stay tuned!!


Tuesday, January 20, 2015

Quick and Easy Dollhouse Miniature Trellis Tutorial

Tutorial: How to make a quick and easy garden or patio trellis


Here's a quick and easy tutorial for a garden or patio trellis. Fun little project with minimum materials or time required.

Things you'll need:
6-7 Wood slats  (coffee stir sticks, popsicle sticks)
1 Small Oblong Wood Piece
Paint
Glue
Garden Vine

This project doesn't take long at all and can be done in between waiting for other projects you're working on to dry. The longest part of this project is waiting for the paint to dry.


Select 3-4 even sized wood pieces (depending on the size of your trellis)

Paint about 6-7 wood pieces your color of choice. I painted mine white. The extra pieces will be trimmed to go horizontal across the trellis


Measure and trim two wood pieces and glue horizontally across the vertical pieces, as shown in the photo


Paint a small piece of wood and glue to the bottom. This helps with balance and stability

Add your vines and glue in place if necessary

  
Ready to set up!


A lot of my materials are every day items I have around the house, like the coffee stir sticks I used. For the vine (and other mini plants I make) I go to the Dollar Tree store and find the smallest plants and flowers they have. Then I snip off the pieces and use however I can.


Thanks for looking and Enjoy! 


Wednesday, January 7, 2015

Tuesday, January 6, 2015

The Greenleaf Travel Trailer in 15 Days

This Travel Trailer project was so much fun! I worked on it non-stop nights and weekends for 15 straight days, and I managed to finish it by Christmas. And I learned a lot while working on it. The kit produces a finished trailer that is completely empty on the inside, so the imagination is limitless when planning and designing it. Since my daughter requested a 50's retro style design, it was easy for me to choose a color theme and the accessories. The challenge was the furniture, since afterall it's a travel trailer so typical mini furniture doesn't work. The balance to that was it wasn't a lot of space to fill. I've posted a few photos below, and I'm working on making a short video. Enjoy!

Greenleaf Travel Trailer
Exterior

Greenleaf Travel Trailer
Exterior - Front End

Greenleaf Travel Trailer
Exterior - Rear End. The License Plate says "MINI"


Here are a few photos of the Interior. I added walls to separate the bedroom and bathroom, added upper and lower cabinets in the kitchen area, and built in a couch in the lounge area.

Greenleaf Travel Trailer
Interior - Before the Additions


Greenleaf Travel Trailer
Interior - Finished

Greenleaf Travel Trailer
Interior - Lounge and Kitchen Area

Greenleaf Travel Trailer
Interior - Kitchen Area

Greenleaf Travel Trailer
Interior - Bedroom and Bathroom Area

Greenleaf Travel Trailer
Interior - Bedroom and Bathroom Area

Greenleaf Travel Trailer
Interior - Top View

Greenleaf Travel Trailer
Interior - Top View

The video I'm making has close up photos of the interior and exterior. There's so many cute little details inside. As with any mini project though, photos can never due it justice. You appreciate them much more seeing it in person.

Now that this project is done, I'll finally be starting The Arthur by Greenleaf. I got a new Dremel tool for Christmas, along with a box of attachments, so the kit bashing I have planned will go much smoother now. I will also be practicing while building The Arthur, because once I'm done with that I'm planning to do The Brookwood by Greenleaf. Mine will be a beach house, of course. I've already started collecting items for it :-)


Thank you for looking!