Saturday, December 13, 2014
Travel Trailer Time!
Excited to be working on my next project, the Greenleaf Travel Trailer. My daughter requested it as her Christmas present this year, after finding one in an antique store still new in the box. She's asked it to be decorated in 50's retro style, so I've spent the past month searching for specific items on eBay, etc. to make it as unique as possible. I've been photographing the project step by step, so when it's complete I can make a video and post the pics. It's a very basic and simple assembly, so it's been great to work on and helps me practice for when I start The Arthur. I've got it ready to start, so as soon as the Travel Trailer is done and holidays are over it begins!
Tuesday, April 22, 2014
Keystone of Boston Dollhouse Refurbish
I put together a quick video, about 4 1/2 minutes or so, of the refurbish of the 1949 Keystone of Boston Dollhouse. The video below shows the basic transformation and the finished product. I'm working on a better one that documents the step by step process of each room and the exterior, which I'll post later on. But for now, enjoy!
Thank you for viewing!
Thank you for viewing!
Sunday, April 13, 2014
Whew, it's finally done! Keystone of Boston 1949 Dollhouse
After almost 2 years, it's finally done! My mother's 1949 Keystone of Boston Dollhouse, all grown up. In fairness to me, I've taken many breaks in between but I spent many many hours, days, weeks working on the inside, the outside, and the furniture and decorations. This wasn't just a rehab project, I took special care to leave something original in every room. There is also something personal in every room too, even including the patio. It's been through three generations of little girls, this house was loved and played with by my mother, me and my sister, and our daughters.
My goal was to make the house a realistic modern house, and since the kids are all grown, no longer a toy house. The exterior was an easy choice, as I wanted to stay with the Colonial style and also try to keep the same design as the original screening that was pre-printed on the outside. I used white clapboard siding for the upper half, with brick on the lower half. There were 3 original window frames, the two upstairs bedrooms and the kitchen. I left the remaining two windows open, just framed the exteriors. The roof is removable, and surprisingly in good shape, so I decided to leave it in it's original state.
The interior was a totally different story. Among the challenges was the fact that Keystone of Boston Dollhouses aren't exactly 1:12th scale. I have a mixture of scaled furniture in each room that helps to balance out the realistic look. I'll post a before and after shot of the front below, but I am currently working on a video and detailed photos of each room. There are so many tiny details, it was so much fun to complete!
When I originally began working on the house I had it on an oversized piece of plywood that I had intended to create a yard out of. However, one of the special features of the Keystone's is that it sits on a rotating wheel so you can spin it around. In keeping with the original design, I decided to ditch the plywood and just set it up on a table.
This was a total labor of love. I enjoyed every minute of it, and I am kind of sad it's done. But as they say, is a dollhouse really ever done? I'm always on the lookout for mini's, and always thinking of what room I can update and put things in. For now, I will shift my focus to my new project, The Arthur. I've already kit-bashed it in my head, so this should be fun. I've made a chimney and bought a fireplace for the living room, and I intend to scrap the bedroom window and make a door out to a balcony instead.
Stay tuned!
 |
| Dollhouse Playtime, 1971 |
My goal was to make the house a realistic modern house, and since the kids are all grown, no longer a toy house. The exterior was an easy choice, as I wanted to stay with the Colonial style and also try to keep the same design as the original screening that was pre-printed on the outside. I used white clapboard siding for the upper half, with brick on the lower half. There were 3 original window frames, the two upstairs bedrooms and the kitchen. I left the remaining two windows open, just framed the exteriors. The roof is removable, and surprisingly in good shape, so I decided to leave it in it's original state.
 |
| Original Exterior - Roof On |
 |
| Original Exterior - Roof Off |
 |
| Completed Exterior - Roof Off |
 |
| Completed Exterior - Roof On |
The interior was a totally different story. Among the challenges was the fact that Keystone of Boston Dollhouses aren't exactly 1:12th scale. I have a mixture of scaled furniture in each room that helps to balance out the realistic look. I'll post a before and after shot of the front below, but I am currently working on a video and detailed photos of each room. There are so many tiny details, it was so much fun to complete!
 |
| Original Front |
 |
| Completed Front |
 |
| Original Living Room |
 |
| Completed Living Room |
 |
| Original Dining Room |
 |
| Completed Dining Room |
 |
| Original Kitchen |
 |
| Completed Kitchen |
 |
| Original Bedroom - Left Side |
 |
| Completed Bedroom - Left Side (Master Bedroom) |
 |
| Original Bedroom - Right Side |
 |
| Completed Bedroom - Right Side (Guest Bedroom) |
 |
| Original Bathroom |
 |
| Completed Bathroom |
 |
| Original Patio |
 |
| Completed Patio |
When I originally began working on the house I had it on an oversized piece of plywood that I had intended to create a yard out of. However, one of the special features of the Keystone's is that it sits on a rotating wheel so you can spin it around. In keeping with the original design, I decided to ditch the plywood and just set it up on a table.
This was a total labor of love. I enjoyed every minute of it, and I am kind of sad it's done. But as they say, is a dollhouse really ever done? I'm always on the lookout for mini's, and always thinking of what room I can update and put things in. For now, I will shift my focus to my new project, The Arthur. I've already kit-bashed it in my head, so this should be fun. I've made a chimney and bought a fireplace for the living room, and I intend to scrap the bedroom window and make a door out to a balcony instead.
Stay tuned!
Monday, February 10, 2014
Wall Hanging Tutorial
Tutorial: How to make Easy Wall Hangings for your Dollhouse


The living room in my Keystone of Boston is modern and African themed, so finding artwork for the room was challenging. I realized that I had the tools to make my own, and so I began...
Things you'll need:
Internet Access
Printer
Photo Paper/Cardstock Paper
Toothpicks
Paint/Stain
Glue
The longest part of this project is waiting for the glue and paint to dry.
Please note: I do not sell anything I make. I use everything strictly for my own personal amusement. I'm pretty sure there would be some copyright issues if you googled the wrong photo and attempted to sell it :-)

This is really quick and easy to do. I also made frames out of wooden coffee stir sticks, single toothpicks and some leftover chair rail pieces. Any kind of tiny pieces of leftover wood, metal, plastic or wire would work. You can also glue fabric around a piece of cardboard if you're looking for color, patterns or geometric shapes. The possibilities are endless!
You can print out your own photos of family members, friends or pets if you want to personalize your dollhouse.
There's many printable templates out there to make a lot of things for your dollhouse, they're pretty easy to find on the internet (or Pinterest). But there's a few other things you can do yourself too:
Like I said, the possibilities are endless!
The living room in my Keystone of Boston is modern and African themed, so finding artwork for the room was challenging. I realized that I had the tools to make my own, and so I began...
Things you'll need:
Internet Access
Printer
Photo Paper/Cardstock Paper
Toothpicks
Paint/Stain
Glue
The longest part of this project is waiting for the glue and paint to dry.
 |
| Google what you're looking for, then save it on your device. Scale it down to 1x1 inch or 2x2, whatever size you need. |
 |
| Print out the photo. I used a color printer with photo paper. |
Please note: I do not sell anything I make. I use everything strictly for my own personal amusement. I'm pretty sure there would be some copyright issues if you googled the wrong photo and attempted to sell it :-)
 |
| Take 3 toothpicks and glue them together evenly |
 |
| Let the glue dry |
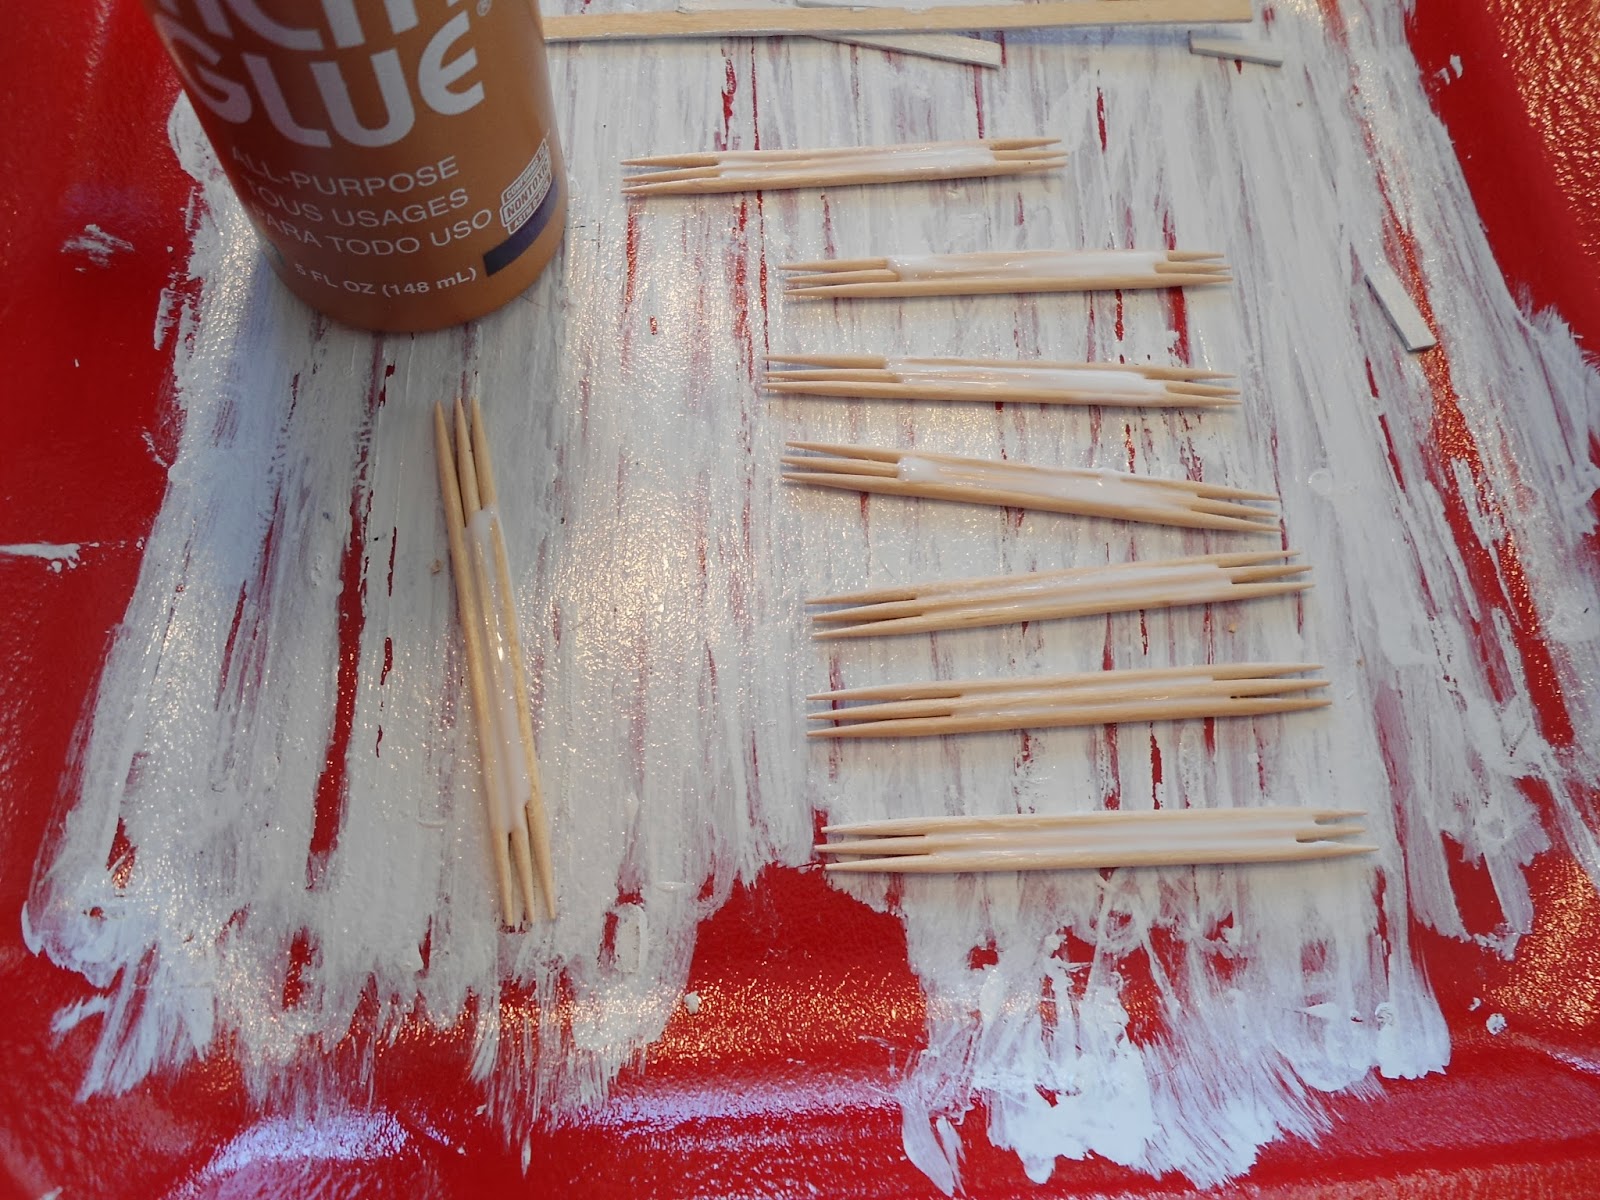 |
| Make 4 sets of the three toothpicks glued together, one for each side of the frame (there are 8 pictured because I made two) |
 | |
| Paint or stain the toothpicks to desired color or shade and let dry completely |
 |
| Glue the painted toothpicks to the edges of the photo |
 |
| Repeat for all 4 sides, then let the glue dry |
 |
| All done!! |
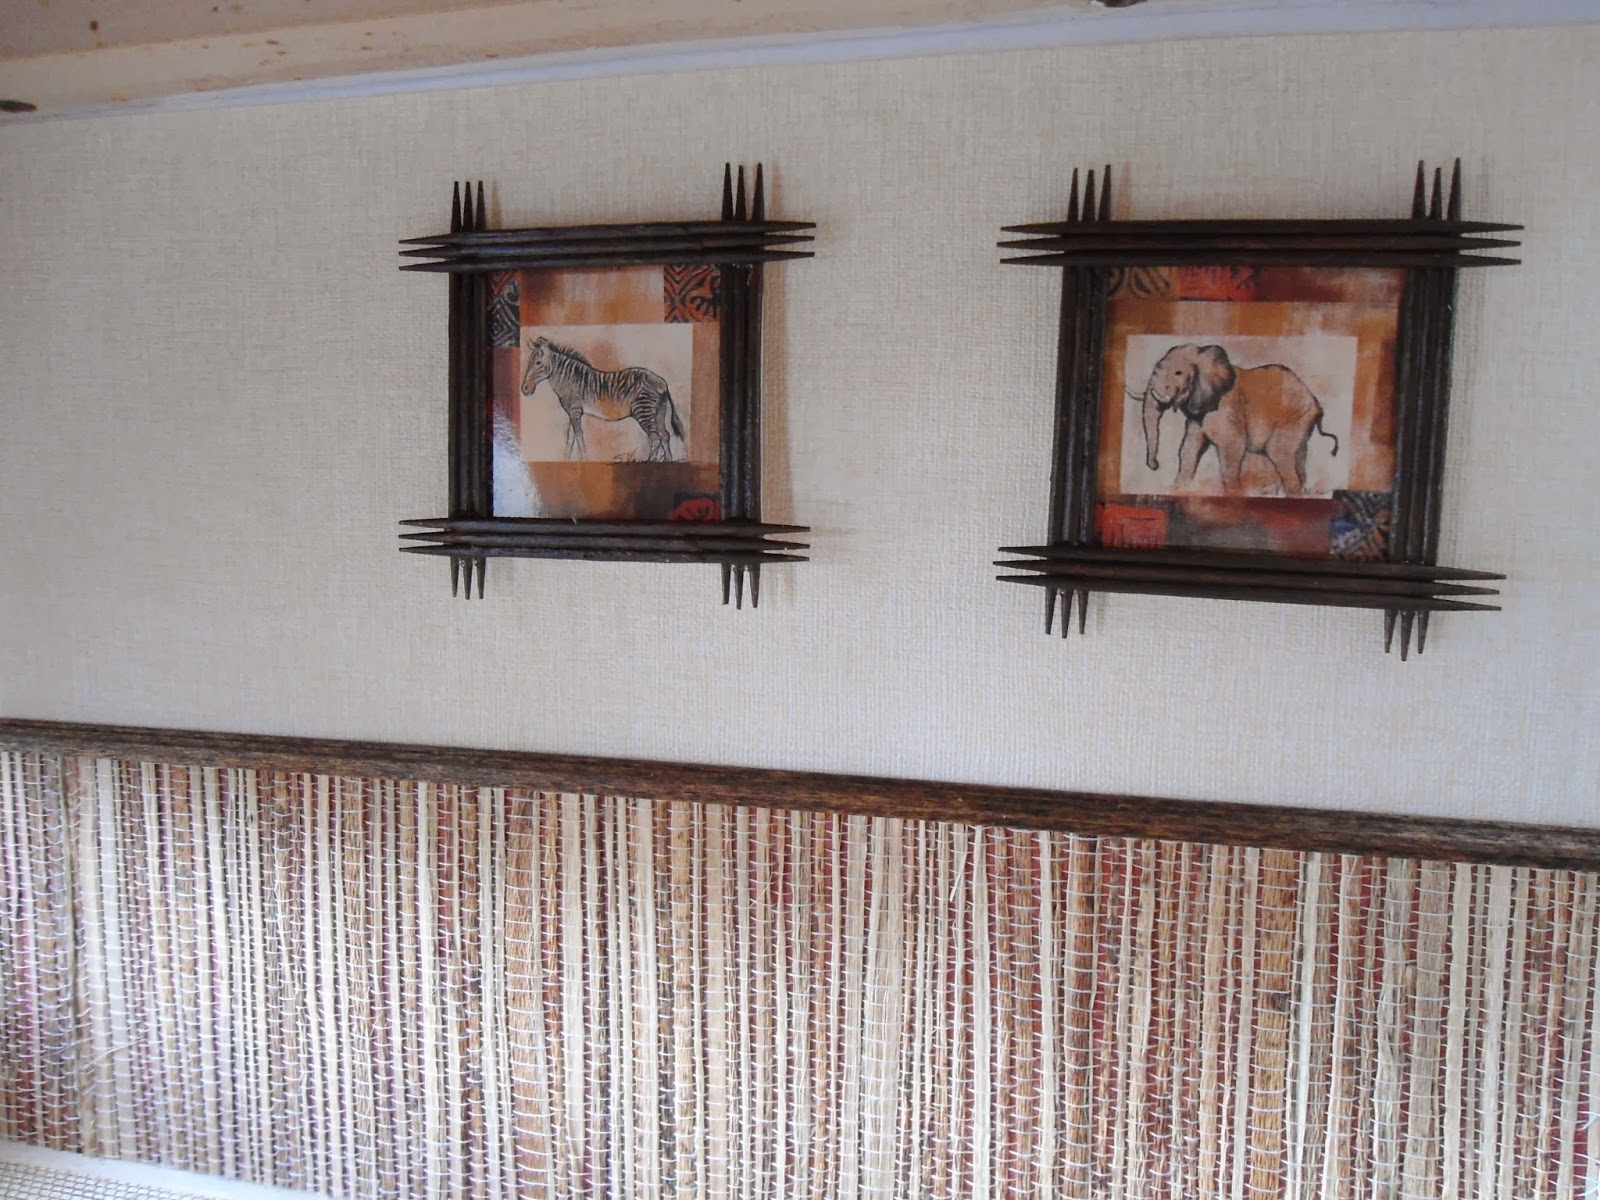 |
| Finished project on the walls |
This is really quick and easy to do. I also made frames out of wooden coffee stir sticks, single toothpicks and some leftover chair rail pieces. Any kind of tiny pieces of leftover wood, metal, plastic or wire would work. You can also glue fabric around a piece of cardboard if you're looking for color, patterns or geometric shapes. The possibilities are endless!
 |
| Painted toothpicks as frames |
 | ||
| Coffee stir sticks and leftover chair rail pieces as frames |
You can print out your own photos of family members, friends or pets if you want to personalize your dollhouse.
There's many printable templates out there to make a lot of things for your dollhouse, they're pretty easy to find on the internet (or Pinterest). But there's a few other things you can do yourself too:
- You can take a photo of your flat screen TV (while it's off), print it out, then glue it to a thin piece of wood, or black painted styrofoam and ta-da! you have a flat screen TV.
- Take photos of favorite places, like vacation spots or monuments, or favorite restaurants or buildings and print them out to put in frames.
- Take close up photos of flowers in your yard, or anywhere you see them, and print them out to put in frames.
- Take photos of your own magazines, newpapers and books and print them out real small and make mini's out of those as well.
Like I said, the possibilities are endless!
Saturday, February 8, 2014
Paper Towel Holder Tutorial
Paper Towel Holder Tutorial
If you're like me, you don't want to spend big money on small things. So as I "window shop" on the internet, I look at things and try to figure out if there's a way I can make it myself with items I already have in my craft room. This is how the Paper Towel Holder came about:

And this is super easy! You don't need much, in fact some of the items are already in your kitchen.
Things you'll need:
1 Napkin or Paper Towel
2 Toothpicks
1 Small Piece of Wood
1 Small Bead or Jewel
Paint
Glue
Scissors
This project doesn't take long at all, the longest part is waiting for the glue and paint to dry.
 |
| Cut a strip off a napkin |
 |
| Get a toothpick ready to wrap it onto |
 |
| Put a small amount of glue on the toothpick in the center |
 |
| Wrap the strip of napkin around the toothpick |
 |
| Glue the edge down |

 |
| Use a small square of basswood or something similar and sand the edges |

 |
| Tap on a nail slightly to make the hole for the toothpick |
 |
| Use another toothpick for the side of the holder, paint the color of your choice |
 |
| Paint the base the color of your choice |
 |
| Put the toothpick with the paper wrapped around it into the hole in the base. Trim the excess toothpick off the top, leave enough for a bead on top. |
 |
| I used a wooden bead as the top piece, anything similar would work. Then trim and glue the side stick to the base. |
 |
| Finished paper towel holder. |
Subscribe to:
Posts (Atom)